We're on the move (again). Been so busy lately with packing and the 'C' word Christmas that I've not been able to do any blogging and not much crafting either for that matter! But the upside of this is I am moving to a house where we have bags more room and apart from one corner which is going to be occupied by my OH and his computer desk, I am going to have a nice big craft room all to myself.... *dances and goes woo! a lot* lol
So I'm not going to be around much for a couple of weeks but just as soon as we have been connected with our super zippy cable broadband connection, I will be back!! And probably with pics of my new craft room *dances again*
Best wishes to all for 2011
Sarah xxx
Wednesday, 29 December 2010
Thursday, 16 December 2010
Inside out upside down
Every so often, I find inspiration to make something and then struggle to pull the rest of the idea together... this was one such occasion! I found a template for making a pop up Christmas tree centre for a card and loved the idea so much I had to have a go. I cut it and folded it where it needed, then coloured it with forest green and the background with black promarkers and thought hmmm that worked, but it needs something else! I bought some tiny little beads from Hobbycraft in their January sales this year and they have just been sitting in the bag not doing anything since then, but I thought they would look good threaded onto the tree like lights so I punched a lot of holes with my pokey tool, and stitched with gold thread and added a bead in every other stitch and there it was, a nice little decorated tree to go inside a card, so I backed it onto some glimmer mist card and stitched it all together with gold thread and added a little punched star to top the tree... only problem was I hadn't got a clue what to do on the outside of the card!

I decided to have a backing paper making session the other night and made green papers. I don't usually work with green, red is my favourite colour, but I made some green card sparkly with some starburst stains and when it had dried, I stamped it up with my wordy stamp and embossed it with gold. I just love how the gold I have works, it really does look like it has been gold plated and it added just the right amount of bling. I then roughed up the edges with my deckle edged ruler and then back it onto some black paper, trimmed to size and then covered the card front with some red glimmer mist card I made a while ago and stuck the topper onto that. Used my sizzix corner accents with black paper and decorated 2 of the corners of the sentiment panel and then had brain freeze for a few hours as I couldn't decide what to do with it next! The more I looked at it, the less I could think what to do with it, so I just left it to go back to. Passing the pram in the hallway I suddenly remembered some black chiffon ribbon I had bought a few weeks ago which was still in the basket at the bottom of the pram - so THAT's where I had put it lol Fashioned a bow with it and placed it at the bottom of the card and still couldn't thing how to decorate the top. Then I thought hang about! I've got more beads so I threaded some more onto wire and looped them round a couple of black brads. I'm pretty into triple embossing at the moment and found I had a little cute tree chipboard shape so attacked it with the gold embossing powder and then stamped into it with a snowflake. It looks like a piece of jewellery now, perfect to finished off the top of the card as it now looks like a necklace.

The inside of the card needed a little extra, so I cut out some more accent corners using scraps of the glimmer mist card and was about to stick them on when I spotted the underside of the card was quite interesting as it was white with red splashes and stood out much better on the black and red lining so used it that way round instead and hence the upside down title lol
I would like to enter this for the following challenges:
OSAAT - Anything Goes
Allsorts - Last Minute Christmas
Friday, 3 December 2010
Doe a deer a golden deer
Anyone who knows me will know that I love red. The obsession started about 5 years ago when I split with my ex-husband and moved into my friend's spare room and suddenly, for the first time in many years I was able decorate exactly how I wanted (ex hated red!) so I went a bit mad! Painted a wall red, bought red bedding, red candles, red dreamcatcher... loved it! I've done quite a bit of crafty stuff in red too, but as it's not everyone's cup of tea, I have had to tone things down a little and not use it as much as I'd like. Then I found a challenge which was to use the opposite colour on the colour wheel from what you usually like, so for me it was green!

I've never been a great lover of green, unless it is lime green so I needed to try something new. I started making some papers using my trusty starburst stains (holiday wreath set) as I had some lovely greens in there. I added a few splashes of red and squished it around and dragged it about and left it to dry wrapped in clingfilm. When it was dry, I covered the front of the card with it and trimmed to size then made a piece of green card sparkly with gold starburst stain and whilst it was still wet sprinkled some gold embossing powder onto it and heated it up with my heatgun and it set really nicely. I love experimenting! When the card was dried I cut it with my deckle rectangle nestie.
For the stamp, I used a stamp which my Mum had given to me ages ago but I had never got round to using, it's from Anita's but I am not sure what it is called or even if it is a reindeer or a deer, but I think it will pass for either. I stamped it up with clear embossing ink and then embossed with gold embossing powder. I don't use gold very often and I have a huge tub of it but it's a shame I don't use it more as the effect is really nice and looks gold plated. When it had set, I coloured the body with cinnamon promarker, adding a bit of depth and shadow in places, then cut out again using my largest nestie. My local art shop had some bags of offcuts of nice Christmassy papers on sale for a quid, so I availed myself of those last week and have used the holly embossed shiny card from that pack to create the panel across the centre of the card. The green deckle rectangle I placed on top of that and the reindeer/deer panel offset on top of that.
It's a good job I have so much of the gold embossing powder really as the snowflake in the top right hand corner was done using the smallest nestie from the deckle set and a piece of cornflake packet then triple embossed and stamped with a snowflake. At the bottom I put some tartan red and green ribbon then to finish, I stitched a gold bow in the bottom right hand corner. I picked a bag of these up about a year ago and have never used them!
The more I look at this card, the more the red and green background looks like a forest when it's not quite light but with the gold there is a little sunshine coming through the trees as the sun rises or sets. I think it looks quite magical :-)
I would like to enter this for the following challenges:
The Stampman - Take Any Three Colours Christmas Theme
Ladybug Crafts - Caz's color wheel (my usual is red so I used green mainly)
Passion for Promarkers - Old and New (Stamp is old, triple embossing new technique)
The Corrosive Challenge Blog - Things That Move (The deer is running lol)
Rainbow Lady's Challenge - Christmas Animals
Monday, 29 November 2010
Winter white with a splash
When winter arrives, you know it will be white! If not snow, it's frost on windscreens and on the ground with that lovely shimmer it gives to everything. Lovely that is right until you have to go anywhere outside and it hurts to breathe and there is a high chance that you might slip and end up flat on your bum lol Nothing better than being inside in the warm when it is like that and looking out on it all in all it's beautiful whiteness.

Challenge 35 over at Craft Cardmakers is for white and a splash and a winter themed card fits in really well I think. I have made this for my mother-in-law and her husband as their Christmas card, and once again I have succeeded in making a card which doesn't actually mention Christmas, but has all the elements of winter in it. A few weeks ago, on one of my regular raids on the second-hand table at my local art shop, I found a lovely wordy stamp which is Funstamps - Let it Snow, winter words with some snowflakes thrown in for good measure, picked it up for a couple of pounds and I was made up with it as it was brand new too! I used stazon cotton white to stamp it onto some acetate, and then used one of my deckled rectangle nesties to cut it out and used a larged nestie to cut some lilac paper to match, then I used just a touch of tacky glue in the corners of the acetate to stick it to the lilac layer.
I have become quite a ribbon hoarder sinced I started crafting as I found a stall in the market which bags up ends of rolls and sells them quite cheaply so whenever I am passing I stock up as you never know what colour ribbon you will need next when you're making cards. Hence I usually have a colour for every occasion - only problem I had this time was finding one which was the right thickness to match the lilac, but the only one which was the right thickness was purple, but it makes the snowflakes standout more - plus it is just the right width to use to trim the gift I have made to go with it (but you will have to wait to see that!). The corners are die-cuts from sizzix architectural accents which I picked up on Ebay a couple of months ago which I bought purely because with combined p&p I didn't pay much for it at all and I have to say I am glad I did get it as I have used it more than the item I was actually buying in the first place! So with corners put in place, and a few snowflakes to finish off I think this is a very simple and clean but effective card. Just hope my mother-in-law likes it!
There are a few challenges I would like to enter this for:
Crafts and Me - Dreaming of a white Christmas
Artful Inkables - Punches and or Diecuts
Wednesday, 24 November 2010
Crafty candle container

Over at Crafty Cardmakers this week we have a spotlight on containers and fancy envelopes, and I wanted to try something new so I went off in search of a different type of container to make, thinking outside the box as it were lol A quick google search found a whole zip file of downloadable templates for making all sorts of different boxes, but the one I chose was mysteriously named box_flap_lrg... and it is really simple to make. It's basically a square of card measured and marked and scored in the right places so that it folds up and makes a lovely box which you can put things in! Being a bit short of cash this year, most people are going to be getting something handmade and I have got a stock of lovely smelly tealights ready to be gifted, but need to make some boxes to put them in!
Once you have got the card cut from the template and folded, it is really simple to decorate and you could do anything with it really. In my stock I have some sheets of a silver paper/material which is really shimmery and perfect for using as the base for the decoration of this box. As anyone who has read my blog will know, I have a love of starburst stains and occasionally I experiment making a new background and then don't use it for a while and this is what happened here. A while ago I made one using the mayday flowers set and it sat in my paper storage paper looking for a home, and with the addition of some snowflakes stamped onto it and cut to size to fit the flaps on the top of the box, I found the perfect home for it.
I punched some holes in and put some matching eyelets into the centre corners of the flaps and tied the whole thing together with some pale blue ribbon and adorned the tips with some snowflakes punched from the leftover card.
So what is inside? 4 ice blue tealights which have a lovely ocean breeze scent, but you could really use it to put anything in! Money, chocolates, jewellery :-)
I would like to enter this for the following challenges:
Caardvarks - Giftcards/Money Holders
Stamptacular Sunday Challenge - A Time for Giving
Monday, 15 November 2010
A Crafty card and a matching gift
A few days ago, I was asked to join the Crafty Cardmakers Design Team and must say I was over the moon to be invited. I have been following their blog as long as I have been blogging and have loved the projects that the existing team have produced and it was a real honour to be asked to join them!
The challenge at the moment is to make a card and a gift. There's a fab prize on offer from the sponsor The Stampman who have a £10 spend in their shop up for grabs for the winner. Definitely worth an entry with that fabby prize on offer. The Stampman have such a lot of exciting stuff on sale for the craft-minded types. I went to their shop in Skipton a few weeks ago as there was a demo day and I have to say their shop is fantastic! I spent all day there and wasn't bored at all as there was so much to see and do and buy... I was like a kid in a sweetie shop! The staff there are really friendly and helpful too so if you are in the area it is well worth the trip to visit them.
One of my most favourite crafting products in the world is available from The Stampman... and that is starburst stains. If you have a look on my previous bloggings, you will see I use them a lot. I have 2 different colour sets (Mayday Flowers and Holiday Wreath) plus a few extras for variety of colours and they really are the most amazing products I have ever got my mitts on. You can create backgrounds and paint with them plus do lots of other things with them and the effect is amazing. I have used poinsettia red gold, tiger lily red orange and cathedral pines olive from the Holiday Wreath set to colour a piece of off-white card. Basically I painted it with the main colour and then added splodges and dashes of the other colours and then covered it with cling-film and scrunched it up a bit as that makes lovely veiny lines when it's dried. I fashioned the card into a box, punched some butterfly shapes in each of the four faces with my Sizzix paddle punch, backed the holes with some amber-coloured floral vellum (not that the design mattered, I just wanted the glow!) and decorated the box with some paper flowers which I coloured to match with promarkers in ruby and bright orange. Then, I created a smaller lid type thingummybob inside the box to hold a battery operated tealight. And there you have it, a tealight luminaire, perfect as a gift!

The card, is made from matching card and I made it a foldy card, decorated with some freebie digi papers I found online and embellished with some more flowers to match the luminaire. The centrepiece is a Lily Pickle Decoupage fairy from their Xmas package. I loved it when I saw it as being a slightly gothicy style liking person, and with a daughter mad into manga and anime I knew I would have a lot of uses for it. It's perfect and fits in with my card so well. I used the punched out butterflies to add an extra bit of continuity between the card and the luminaire and there it is a card and a matching gift!

As you can see here, the luminare glows beautifully and it actually flickers like a real candle but obviously with out the risk of burning the house down owing to it being sat in a cardboard box lol
 I'd like to enter this for the following:
The Stampman - Christmas
The challenge at the moment is to make a card and a gift. There's a fab prize on offer from the sponsor The Stampman who have a £10 spend in their shop up for grabs for the winner. Definitely worth an entry with that fabby prize on offer. The Stampman have such a lot of exciting stuff on sale for the craft-minded types. I went to their shop in Skipton a few weeks ago as there was a demo day and I have to say their shop is fantastic! I spent all day there and wasn't bored at all as there was so much to see and do and buy... I was like a kid in a sweetie shop! The staff there are really friendly and helpful too so if you are in the area it is well worth the trip to visit them.
One of my most favourite crafting products in the world is available from The Stampman... and that is starburst stains. If you have a look on my previous bloggings, you will see I use them a lot. I have 2 different colour sets (Mayday Flowers and Holiday Wreath) plus a few extras for variety of colours and they really are the most amazing products I have ever got my mitts on. You can create backgrounds and paint with them plus do lots of other things with them and the effect is amazing. I have used poinsettia red gold, tiger lily red orange and cathedral pines olive from the Holiday Wreath set to colour a piece of off-white card. Basically I painted it with the main colour and then added splodges and dashes of the other colours and then covered it with cling-film and scrunched it up a bit as that makes lovely veiny lines when it's dried. I fashioned the card into a box, punched some butterfly shapes in each of the four faces with my Sizzix paddle punch, backed the holes with some amber-coloured floral vellum (not that the design mattered, I just wanted the glow!) and decorated the box with some paper flowers which I coloured to match with promarkers in ruby and bright orange. Then, I created a smaller lid type thingummybob inside the box to hold a battery operated tealight. And there you have it, a tealight luminaire, perfect as a gift!

The card, is made from matching card and I made it a foldy card, decorated with some freebie digi papers I found online and embellished with some more flowers to match the luminaire. The centrepiece is a Lily Pickle Decoupage fairy from their Xmas package. I loved it when I saw it as being a slightly gothicy style liking person, and with a daughter mad into manga and anime I knew I would have a lot of uses for it. It's perfect and fits in with my card so well. I used the punched out butterflies to add an extra bit of continuity between the card and the luminaire and there it is a card and a matching gift!

As you can see here, the luminare glows beautifully and it actually flickers like a real candle but obviously with out the risk of burning the house down owing to it being sat in a cardboard box lol

The Stampman - Christmas
Thursday, 11 November 2010
Icy cold creation
Winter is definitely on it's way. There is a cold chill on the wind and every night a light frosting forms on my car, that is providing it isn't raining... it's still doing a lot of that too. Guns n' Roses didn't have it far wrong with their song titled November Rain did they? I quite like winter, though not as much as Autumn, providing that it isn't too icy and snowy making it dangerous to drive (or walk) anywhere. I wonder if we are going to have as much snow as we did earlier this year... it was quite funny as my partner and I saw the snow one evening and he said it wasn't going to stick, yet an hour later we looked out and it was approx 5 inches deep! Not let him live that down yet... in fact I have it as one of my favourite quotes on Facebook lol I think the snow took us all by surprise to be honest as we don't usually get much snow where I live and I certainly hadn't seen anything like it in my life!

Winter, to me, means ice and cold and snowflakes. It means Christmas is on it's way (Boo!) and everyone is going to have to get up extra early to de-ice their cars before they can drive to work. This card captures the general feeling of coldness in the air, in fact I started to feel decidedly cold whilst making it and had to go and put on a jumper! I started with a Sweet Pea stamp ching-chou kuik's Blue Eye Fairy. I love this stamp as there are so many different colours which suit it, she looks lovely with natural coloured hair, or coloured blue which makes her look like and ice maiden. I have coloured the image using promarkers in powder blue and denim blue for the hair and dress, then ivory and a touch of almond which has given her a very pale complexion, perfect for a cold winter. For the flowers in her hair I used a touch of sky blue and then highlighted with some gelly roll metallic pens to add a bit of glitz. I then cut the image out using my deckled rectangle nesties
I love flowers at anytime of year, and I bought some Color Me Crazy white paper flowers from my local Hobbycraft a few days ago. They are really pretty with a gem in the middle to start with, but because they are paper they take any colouring technique you want to throw at them. I threw a combination of matching promarkers and gelly roll pens to coordinate with the rest of the image then set to work on building the card up. The blue snowflake backing paper is one I bought from a local arts & crafts shop last year, but I have just been back there today and they no longer have any which is a real shame as it is so glittery and sparkly that it is perfect for winter time cards. In my stash, I have been hoarding a pack of papers I bought from QVC earlier this year which are white and silver designs and I really thought it was just papers until I opened it and discovered that there are some sheets of printed sheer material in there and I used a piece that looks almost sprayed on to dress the centre panel of the card. The sentiment was stamped in silver and then embossed with a little powder to bring out the bling, then I backed the main image and the sentiment with a piece of glittery blue paper and offset it slightly, added the flowers and here it is. Brrrrrr don't you get cold just looking at it?
I would like to enter this for the following challenges:
In a Sweet Pea Dream - Where have all the flowers gone?
Crafts and Me - Glitter
Sir Stampalot - Christmas Traditions
I Love Promarkers - Icy Colours
OSAAT - Winter Wonderland
Friday, 5 November 2010
Snowflakes, Sparkle and Something New!
Well, I've finally done it. Yep, I've made a start on my Christmas cards! Not got too many to make, but this time of year is a great excuse to make lots of cards and blow the dust and cobwebs off all that festive stuff I have been hoarding. Being a fairly new card maker I like to try out a few new ideas on my cards and have certainly done some different and new things on this card (well they are to me lol)
I am what you would class as a hoarder. I hoard everything and my only defence is I come from a long line of hoarders... and craft stuff is no exception. I think it was because the first papercraft project I ever did was my partner's scrapbook for his 40th birthday, and I still refuse to throw away any scraps of paper 'just in case they come in useful'. And believe me I have folders and storage boxes full of scraps and other bits and bobs I just can't bring myself to throw away. I did get myself sorted earlier this year and put all my xmas stuff separate so it wasn't cluttering up the rest of my stash when it was only going to be used a couple of weeks a year. Fun side of that is I generally forget what I have and it always comes as a nice surprise when I dig it all out again and discover things I had forgotten I had :-)
 Anyways... onto this card. I only discovered Stazon ink a few months ago and was so impressed with it's ability to stamp onto awkward surfaces and bought myself a pack of acetate sheets to have a mess around with and then the whole pack sat on the shelf waiting for me to decide what on earth I was going to use it for. Christmas cards and the like seem to be obsessed with snow, but snow is white and unless I embossed with white powder it didn't really show up as snow, just blank bits on a piece of white paper. Well that just isn't good enough hehehe I while ago I had bought some cotton white opaque stazon and snow is the perfect use for it when stamped on acetate. I found I had a nice snowflake stamp and it worked really well on the acetate in white... so from this point the snow shaker card was born... a first try at a shaker card for me and I think it worked (though I have to admit I had a prototype that went a bit pear-shaped when I tried to take out some of the snow, but I will pretend that never happened). I stamped a cute snowman image onto some card and coloured it with promarkers and then coloured round it in black (I can take no credit for this part as my daughter suggested the snow would show up better on a dark background) and then I created a reservoir for the snow out of a roll of foam tape so I had some nice long strips - it was too wide but I cut it down the middle and it worked just fine and formed a frame around the stamped image. Then I filled it with snow (or holographic embossing powder to you or me as it was nice and fine and a little goes a long way) and then peeled off the paper from the tape stuck the snowflake stamped acetate to seal in the powder. Trimmed it to size, stamped some more snowflakes on some dark blue card and made a frame for it.
Another thing I have accumulated is embossing folders. I have a few in varying sizes but they are usually too small for my project or not the right pattern but I used a really simple polka dot Cuttlebug folder for this one as I wanted to do it in two halves for sky and ground. I initially embossed a piece of the same dark blue card I had used for the frame and swiped the white stazon over the nobbly bits (I am so good with my descriptions aren't I?) to pick the detail out in white so it would look like snow, but although it showed up ok, it wasn't totally clear as the ink is opaque. So I waited patiently for it to dry... (ok, so I cheated and blasted it with my heatgun) and then got out my clear embossing pad and really worked it into the pattern so that it would get down to the flat bit and then sprinkled a load of the holographic embossing powder I had used for the snow, tapped off the excess and blasted it with my heatgun again and OMG if it doesn't sparkle like a snowy sky! I then embossed a piece of plain white and did the same embossing trick with it to create a carpet of gleaming snow for the base of my card.
With having the snow behind acetate to contend with and the likelihood of this ending up on a family member's mantlepiece this Christmas, I think an easel is the only way this would stand up at the right angle without falling over due to the additonal weight of the acetate frame at the front. Might try another construction as I LOVED making this card but this one works great. The stopper for the easel and the sentiment is cut from a test piece of the dry embossed card with holographic powder embossed over that, cut with my labels 4 nesties set from The Stampman. The sentiment Let It Snow (the title of my all-time favourite Christmas time song!) was stamped and embossed with some Jydrangea Blue Mauve moonglow powders (also from The Stampman) and then embossed over again with more of the holographic stuff. I've been hoarding a small length of tartan ribbon as it needed a Christmas card to live on and I hope it likes it's new home at the front of this card. I punched a few snowflakes (again embossed for added sparkle) and used these as the finishing touches.
This photo shows the snow all over the image, which is probably how it will look when the recipient takes it out of the envelope...

But as the card is tilted, the snow begins to fall and collects in drifts at the bottom of the window...

I'm going to have a play around with a few more thinks to insert in the reservoir on some more cards. Thinking glitter or some tiny pearl beads maybe, but that will have to wait until my next card ;) Might even have a go at my first tutorial on doing this as it is really quite simple to do but so effective, so let me know you are interested and I will do one.
I would like to enter this card for the following challenges:
Craft Challenge - Dry Embossing
I Love Promarkers - Snowflakes
Creative Inspirations - Create a Shaker card
Charisma Cardz - With Love at Christmas
Everybody Art Challenge - Untraditional Christmas
The Stampman - Anything Goes Christmas
Pattie's Creations - Make a Christmas Card or Creation
I am what you would class as a hoarder. I hoard everything and my only defence is I come from a long line of hoarders... and craft stuff is no exception. I think it was because the first papercraft project I ever did was my partner's scrapbook for his 40th birthday, and I still refuse to throw away any scraps of paper 'just in case they come in useful'. And believe me I have folders and storage boxes full of scraps and other bits and bobs I just can't bring myself to throw away. I did get myself sorted earlier this year and put all my xmas stuff separate so it wasn't cluttering up the rest of my stash when it was only going to be used a couple of weeks a year. Fun side of that is I generally forget what I have and it always comes as a nice surprise when I dig it all out again and discover things I had forgotten I had :-)

Another thing I have accumulated is embossing folders. I have a few in varying sizes but they are usually too small for my project or not the right pattern but I used a really simple polka dot Cuttlebug folder for this one as I wanted to do it in two halves for sky and ground. I initially embossed a piece of the same dark blue card I had used for the frame and swiped the white stazon over the nobbly bits (I am so good with my descriptions aren't I?) to pick the detail out in white so it would look like snow, but although it showed up ok, it wasn't totally clear as the ink is opaque. So I waited patiently for it to dry... (ok, so I cheated and blasted it with my heatgun) and then got out my clear embossing pad and really worked it into the pattern so that it would get down to the flat bit and then sprinkled a load of the holographic embossing powder I had used for the snow, tapped off the excess and blasted it with my heatgun again and OMG if it doesn't sparkle like a snowy sky! I then embossed a piece of plain white and did the same embossing trick with it to create a carpet of gleaming snow for the base of my card.
With having the snow behind acetate to contend with and the likelihood of this ending up on a family member's mantlepiece this Christmas, I think an easel is the only way this would stand up at the right angle without falling over due to the additonal weight of the acetate frame at the front. Might try another construction as I LOVED making this card but this one works great. The stopper for the easel and the sentiment is cut from a test piece of the dry embossed card with holographic powder embossed over that, cut with my labels 4 nesties set from The Stampman. The sentiment Let It Snow (the title of my all-time favourite Christmas time song!) was stamped and embossed with some Jydrangea Blue Mauve moonglow powders (also from The Stampman) and then embossed over again with more of the holographic stuff. I've been hoarding a small length of tartan ribbon as it needed a Christmas card to live on and I hope it likes it's new home at the front of this card. I punched a few snowflakes (again embossed for added sparkle) and used these as the finishing touches.
This photo shows the snow all over the image, which is probably how it will look when the recipient takes it out of the envelope...

But as the card is tilted, the snow begins to fall and collects in drifts at the bottom of the window...

I'm going to have a play around with a few more thinks to insert in the reservoir on some more cards. Thinking glitter or some tiny pearl beads maybe, but that will have to wait until my next card ;) Might even have a go at my first tutorial on doing this as it is really quite simple to do but so effective, so let me know you are interested and I will do one.
I would like to enter this card for the following challenges:
Craft Challenge - Dry Embossing
I Love Promarkers - Snowflakes
Creative Inspirations - Create a Shaker card
Charisma Cardz - With Love at Christmas
Everybody Art Challenge - Untraditional Christmas
The Stampman - Anything Goes Christmas
Pattie's Creations - Make a Christmas Card or Creation
Tuesday, 2 November 2010
Sequins, Swirls & Spots!
Not been able to craft much lately due to the half term holidays, having 4 kids at home and trying to get time to myself is not the easiest thing in the world... add to that my 3 year old has just come down with chickenpox... then just when I thought I would have time to get something done I got a migraine... not been a good time all round really!

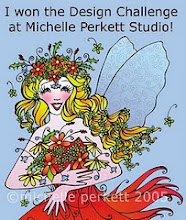
The image I have used for this card is one from Michelle Perkett, which I was lucky enough to win in a challenge - my first ever prize! Yay! It's called Princess Oceana. One of the things I love about digi stamps is the way you can print them to whatever size you want and it also makes it easier to layer the image and make it a little 3D. The shells on this image just screamed out for that. I coloured the main image with a combo of promarkers and gelly roll pens to add a bit of sparkle. The flowers are from stock and the 2 smaller ones are coloured to match the image and centred with a sequin for a little more sparkle.
To add a bit more depth to the card, I stuck the image to the front of the card and trimmed along the edges of the image to give a cutaway effect to show off the flowers which are inside. The inside of the paper uses a Bearly Mine freebie which is a gorgeous design I think. I then punched the corners and added some silver trim to show the paper off.
I am entering this for the following:
Bearly Mine Designs - Design Team Call
Crafty Cardmakers - Spotlight Digital Plus
Lexi's Creations - Anything Goes
Michelle Perkett Studio - Under The Sea
Monday, 18 October 2010
Autumn Tactics
So you're back this way again... Winter's one breath away...
If you know Chicane, those words might sound familiar, and if you haven't already guessed from the title of this post, that's where my inspiration for this card came from. Autumn (providing it doesn't rain constantly) is my favourite season. I just love the colours, the trees fading to shades of brown, orange and crimson but above all I love the smell! I don't know what it is about the scent of autumn that appeals to me so much, but I love the scent of walking through a forest and there is that smell of damp earth and leaves on the ground. Plus knowing that winter is only just round the corner too...

The stamp I chose for this project is Sweet Pea ching-chou kuik's Masked Fairy in Green, but obviously I haven't coloured it in green! I used pumpkin,burnt orange, cinnamon and ruby promarkers to colour the dress and the wings and hair and used touches of pear green for the leaves and used dusky pink and blush to colour the skin. Used one of my new nesties I bought at The Stampman shop the other day and edged it with burnt orange. Got hold of some new starburst stains and moonglows there too and have used these to make the papers. I posted the other day about making some paper using the scrunch technique and finding a devill staring back at me when I unfolded it, well I have used half of that piece to make the background of this, so it's now only half a devil lol Used a sizzix paddlepunch leaf design to bash some holes in it to show off the stained paper underneath and used the punchouts to edge the bottom of the image and added a flower and some pumpkin orange coloured satin ribbon made into a bow trims it off, shredded the edges to add a more distressed look (obviously a scrunched background doesn't look distress enough lol) then, simply because I wanted a bit of bling, I added a butterfly charm :)
I would like to enter this for the following challenges:
The Stampman - Autumn
Cowgirls Sunday Challenge - Create your own background
The Craft Pad - Distressed or torn edges
Let's Ink It Up - Use halloween colours
Crafty Cardmakers - Use a freebie (the ribbon was free)
The Pink Elephant - Brown and Orange
Saturday, 16 October 2010
Devil of a time with The Stampman
I spent a lovely day up in Skipton today at The Stampman. Had a fantastic day. Came home to play with some of my stash and used some of my starburst stains to do some paper using the scrunch technique and was showing my darling OH how it is done. Opened up the scrunched piece of paper to show him the effect and was like OMG! I could see a devil in it. Please look and tell me I'm not going mad!

Should I be scared?

Should I be scared?
Wednesday, 13 October 2010
Foldy Fairy of Forgiveness?
Last year, my partner and I were in lumber with his sister as we forgot her birthday. Oops! My only defence was I didn't actually know when her birthday was to forget it, but my partner did, and I don't think she has spoken to him since. It's not as though I wouldn't have welcomed the excuse to make another card now is it? Well, this year, I am taking no chances and have made her card a month early and left it at her mother's. Ha!

I have been fascinated with foldy cards for quite some time, done a few easel cards, variations with easel cards and also done a few cutty foldy cards. This is another cutty foldy card! It looks quite complicated to do, well it is and it isn't. Just takes a bit of preparation and careful measuring and then it is quite simple. Simple but effective and makes people go WOW! Well that is the reaction I have got from the people I have shown this card to anyway.
It started life as a plain and simple piece of A4 card which I measured in increments of 1 inch from either end, leaving the centre section a different size. Then it is a matter of deciding where the peaks and troughs should go, creasing or cutting where appropriate and decorating. Of course, I now have a template I use so I know where to cut and fold, but I had to work it all out for myself initially lol
The image I used is Serenity from The Stamping Boutique, it's a digi stamp and I love the way you can resize them which you obviously can't with a rubber stamp. Coloured with bluebell and amethyst promarkers as my sister-in-law's favourite colour is lilac which is the colour theme I continued throughout the card - even the main card is lilac! Once I had put the card together, I decided to colour another copy of the dress and face part of the image and make it 3D as with all the folds it was looking a little flat. I had forgotten that I had resized the image slightly when I printed the first one, and the second one was a bit smaller, which I didn't actually notice until I had coloured it and cut to size and applied the sticky pads. Turns out it was a happy accident as it still lined up nicely at the top and gave some layers to the bottom of the dress. Yay! The papers were courtesy of Vix who kindly printed off some sheets from a CD she has. Couldn't resist making some of the butterflies on the paper 3D too :)
I would like to enter this card into the following challenges:
Crafty Cardmakers - Spotlight on Fancy Folds
Karber Monthly Challenge - Fantasy using a digi
Craftalicious Challenges - Anything Goes
OSAAT - Digi stamp
Create4fun - Use digi stamp
Monday, 4 October 2010
Summer is gone
Well it is over, it's now October, we've had lousy weather all summer, so why is the sun shining and we have blue skies? We could have done with nice weather during the summer holidays when the kids were off! Instead, stuck at home most of the time with a hyperactive LOUD toddler, a teething baby plus 2 older kids who were bored. Ah well, should enjoy the sun whilst I can! My eldest has gone on a residential trip this week with school so she should be having fun and not be getting too wet, well for today at least.

The inspiration for my card this time, came in the form of a picture message I got on my blackberry, a cute snuffly hedgehog hiding in the undergrowth. I haven't seen a live hedgehog for years, sadly the only ones I ever see might have done well to study the green cross code. But there he(she?) was and I thought autumn is definitely here now.
The image I have used is a Tiddly Inks digi stamp of a hedgehog and butterflies. What better image to choose for autumn colours? Mr Hedgehog is coloured using cinnamon and sable promarkers and the butterflies coloured using burnt orange and pumpkin. I have hardly seen any butterflies this year, but for some reason they love the plant which climbs up a neighbours wall and I have seen common anglewings and red admirals which inspired the colours for this card. Ripped edges touched up with tan promarker added to the rustic feel. I added some pumpkin coloured ribbon and some paper flowers with buttons stitched onto them to finish the topper off. The backing paper is a colorbok paper from a set my friend bought me in the states, and the base of the easel uses a sheet of crackle effect paper I bought in papermill earlier this year. The 'stopper' is another piece of the first DP cut and punched on the corners with a punch which I think looks just like the lower wings of the butterfly at the front of the card.... The butterfly in front of the hedgehog, is cut from the same DP as the backing to the image and it really does fly as I mounted it behind the easel on a strip of acetate, so when there is a bit of airflow near it, it flutters :)
For many years, I have loved looking up quotes to fit my mood or an occasion and the quote I have used on this card is Autumn is a second spring when every leaf's a flower by Albert Camus. Sums it up perfectly!
I am entering this in the following challenges:
Secret Crafter Saturday Challenge - Easel
Tiddly Inks Challenge - Crackle Accent
Aly's Sunday Challenge - 2 DPS and 2 buttons
Craftalicious - Harvest Festival/Autumn
Sentimental Sundays - Autumn or fall
The ABC Challenge - E is for Easel
Wednesday, 29 September 2010
A helping hand

The very powerful and the very stupid have one thing in common. Instead of altering their views to fit the facts, they alter the facts to fit their views...which can be very uncomfortable if you happen to be one of the facts that needs altering. - quotation from Doctor Who
al·ter (ôl
 t
t r)
r)v. al·tered, al·ter·ing, al·ters
v.tr.
1. To change or make different; modify: altered my will.
2. To adjust (a garment) for a better fit.
3. To castrate or spay (an animal, such as a cat or a dog).
v.intr.
To change or become different.
Well much as it amused me to see the definition of alter described in the terms of the castration of an animal, I didn't really think it quite appropriate to use for my project (besides I don't have any furry pom-poms ;) So I shall use 1.
I have been into decopatch for a fair few months now, and find it is the perfect medium to alter an item. My friend Mandy had made a mould of her hand from plaster of paris ages ago to keep her rings on and in my search for something to alter, I talked her into letting me get my hands on it (no pun intended lol).
Mandy likes animal prints, but I didn't want to make this too jungley so I just used some tiger-striped paper I had. Because you use at least 4 different patterned papers when you cover something, it really doesn't use up much paper at all. And I love it. So far I have altered a mirror and a papermache heart to match each other to go in my bedroom and will one day get them actually into my bedroom when I have moved my baby son into his own bedroom as he currently occupies the area in front of my dressing table. The mirror currently resides in the kitchen. Sits on top of the hob when not in use which may sound a strange place to keep a mirror, but it sure comes in handy for putting make-up on due to the hob light lol
Anyway, the hand is now sufficiently altered and the plus side of the decopatch glue is that it puts a nice hardwearing glaze onto the item so it should be pretty resilient now :)
Close-up showing it in use as a ring-holder

Makes me think of The Addams family in this one lol

I am entering this into the following challenges:
The Stampman Challenges - Altered
Tuesday, 28 September 2010
Oriental wishes

My 11 year old daughter is obsessed with all things Japanese, sushi, manga, anime... so she came in very handy as the source of the stamp set I have used for this card. We bought it in the QVC shop earlier this year, it's a Personal Impressions stamp set, possibly from the Beryl Peters Collection as that is what it says on the side of the stamp of the lady.
I stamped the images out onto white cardstock intially and coloured with promarkers, and only used 3 different colours, ruby, pastel yellow and gold metallic. I wanted to keep a very simple colour scheme of black, red and gold and used my nesties to cut out the black paper which backs the kimono then used a larger size to create the frame. The edges of the card are again a QVC find and I have loved using these again, finally having an excuse to use the Japanese writing ones. The kimono itself is raised from the background using some foam pads as it needed a little depth I felt to bring it to life. I wanted to put a sentiment above the kimono to say Happy Birthday (in Japanese of course) and as usual my printer was refusing to play ball and print on vellum, so I printed it on white paper and traced it onto a piece of white vellum using a fab Japanese brush pen (ok I bought that in QVC too lol - have you guessed I live pretty close to the outlet shop yet? lol)
Not sure if the photo shows up that the front of the card is smaller than the back of the card or not, but I did a cutaway to used the lady and the fan as a runner down the inside, but wanted it to be visible, if that makes sense? Nothing with me ever makes sense to other people but it all makes sense in my head... honest! lol
I have entered this for the following Challenges:
Crafty Cardmakers - Spotlight Oriental
Creative Inspirations - 2 or More Stamped Images
Incy Wincy Designs - Anything Goes
OSAAT - Anything Goes - As you like it
Friday, 24 September 2010
The Stampman Challenge Blog - Blog Hop!
I've never actually done a blog hop before so as this is my first I guess that makes me a blog hop virgin! *blushes*
There's a fab prize to be won over at The Stampman Challenge Blog - £30 to spend with them and there are lots of prizes to be won off the design team ladies on the way round. Good luck to everyone if you fancy entering!
There's a fab prize to be won over at The Stampman Challenge Blog - £30 to spend with them and there are lots of prizes to be won off the design team ladies on the way round. Good luck to everyone if you fancy entering!
Monday, 20 September 2010
Pretty distressed box
| There are people who put their dreams in a little box and say, "Yes, I've got dreams, of course I've got dreams." Then they put the box away and bring it out once in awhile to look in it, and yep, they're still there. - Erma Bombeck I have a thing about making boxes at the moment. I think the interest started a few weeks ago when my daughter asked me to make her a box so she could decorate it with faces and call it Dennis. Dennis the box. Ok..... then she was traumatised when Marcus sat on it, so I had to make another one, and Marcus wanted one too, which he said was called Billy. He's a friend of Dennis apparently... or rather he was until Mitchell squashed him hahahaha. So now he is in the bin, and I decided this time I would make a box for myself and decorate it. I haven't given it a name yet... don't want to tempt fate! Another love of mine at the moment is getting my hands messy and making papers to use in my projects. I've seen a few 'distressed' items on various blogs and have toyed with the idea of having a go to see what I could do. I really think it is a matter of getting the right paper to start off with as I tried 'ageing' some paper in a nice bowl of roiibos tea, but when I took it out, it fell apart. Oops! So I scrapped that idea and stuck to techniques I know, and armed with cosmic shimmer mists and a scrunched up piece of paper I set to work on my trusty hob. Now don't get me wrong, the resulting piece of paper was pretty and shimmery, but even though it was crumpled, it just didn't look distressed enough, so I waited til it dried out (OK I didn't exactly wait, I chucked it on a shelf in the oven when it was cooling down after tea) then attacked the paper with some staz-on coloured ink pads and it was starting to look pretty battered up now *grin*. Like with a number of my projects where I try out something new, I find myself with a piece of paper that I know I can turn into something, just can't quite decide what... So I left it overnight and suddenly I had an idea involving a box! Unusually for me, I managed to find a template online which would fit the bill of what I was looking for quite easily. I wanted a heart sort of thing on top so that it folded together and closed rather than a box with a lid and I found one. It went together quite easily and then I flattened it again and covered it with the paper I made earlier - amazing what you can do with a bit of DST... so now I had in my hands what looked like a crinkly box, but it wasn't distressed enough godammit! So I flattened it again and attacked the poor thing further with clear embossing ink, enbossing powder and a good blast from my heatgun mwahahahaha! I got a load of pink lace in the market a few weeks ago and I trimmed the heart to make it stand out, but plain old pink didn't look quite right so I whipped it off, grabbed another piece of lace and misted it and attacked it with more staz-on inks hehehehe I then stamped a Panda stamps butterfly onto a scrap of the distressed paper, stuck that on, wasn't looking quite right so did another butterfly, embossed parts of it and layered it on to give it a 3D look and roughed up the edges of the heart a bit more. Well I'd say it looks pretty distressed now *evil grin* lol ;) | |||
|


Sunday, 19 September 2010
Box for Blings and Fings

I hadn't used my starburst stains for a while and I wanted a misty sort of effect to co-ordinate with the sweet pea image I used this time, Ching-chou kuik's Faraway Moon. The moon is embossed with silver pearl to give it a shimmer and the image is coloured mainly with denim blue and powder blue promarkers, touched up in areas with my trusty gelly roll pens. Not found anything else yet to add a bit of sparkle which is so easy to use and doesn't involve me getting in a glittery mess. I think I have captured the shimmer quite well on this pic.

At the front of the box, as the stop for the easel, I have used a piece of plasti-roc which I have stamped into and then painted with carpathian bluebell starburst stain and embossed to highlight the details of the moon and sun on it. I suddenly hit on the idea that it might work a few days ago and I am pleased with the results, though I do have to say trying to emboss using a clear embossing pen on a semi-porous material can be a bit tricky...

I was lucky a few weeks ago as a family friend went to the states and brought me back a load of craft stuff, mainly embellishments as they can be so expensive over here. I used quite a few embellishments from that haul today, namely the brackets, the sentiments and the blingy bits. I think they call them rhinestones lol
Anyway, here's a pic with one of the drawers open so you can see it is actually quite functional. Seriously skint this year so I think a few friends and family might be getting something similar for Xmas. Hope my Dad will like it lol

So here is where I am entering this one:
Paper Play Challenges - All shapes and sizes
Crafts and Me - Easels
Creative Belli - B-themed embellishments (bow, brackets, blings)
The Sisterhood of Crafters - Simply Handmade
Southern Girls - Anything Goes
Paper Pretties - Pearls, rhinestones or glitter
Tuesday, 7 September 2010
Mermaid moments and memories
Thank f*** the kids have gone back to school so I have a bit more time to think of crafty things!
A new craft shop opened at the weekend near where I live and naturally I had to go and pay them a visit. Quite a nice little shop they have there. I was very happy to spot some Twinkling H2O paints as I had seen something similar at a craft fair a few months back and kicked myself for not having bought some then. Much as I love my promarkers and sakura gelly rolls, I love my watercolours too, but have found that I can't always get the sort of effect that I want on my projects. These paints are totally different as they have sparkle :) You can use them in the same way as normal watercolours, blending and watering down to get very subtle shades, as you can see here which is handy as there were only 6 colours in my set.
The stamp I used is a Sweet Pea stamp, Elaine Cox's Little River Mermaid. Now I have seen the name of it again, it makes more sense as I was a little confused why there was a frog on it and no shells! Ah well, just a good job I didn't find any shells to add on as details lol I painted the stamp with the H2O paints and I can only enthuse about how lovely they are. Really nice to use, and the pots look like I haven't even used them so looks like they will last me quite a while. The colour names are really nice too, Pewter, Ginger Flower, Guatemalan Green, Wild Blueberry, Honey Amber and French Lilac (the only one I didn't use this time round). The shiny colours lend themselves so well to a shimmery mermaid. Anyway, I borrowed the stamp from my good friend Vix, so must thank her and give her credit for that. Handy having a craft guru living close-by and raiding her stash occasionally, plus she's been a good friend to me, especially when she looked after my daughter for the night when I was having my last baby!

Anywayyy I digress. Well it is my blog so I can ramble if I want to! The image was taking on a bit of a bluey green theme, so I accented the flowers with pink and added a little glitter. I bought the glitters months ago at another craft fair and I think this is actually the first time I have actually had a dabble with them. Glitter to me takes me back to school days with bigs tubs of PVA and seemingly even larger tubs of glitter. Somehow I always ended up with more glitter on me than on the paper! Much easier to do little details when you have a glue roller pen like I have now. I trimmed the stamp to size and was about to matt it onto the shimmery bluey green paper which I bought in Benidorm a couple of years back, but then I spotted my threads and thought hmmm, a bit of stitching detail would add to the shimmer, so I did a running stitch around the edge which framed it subtlely. A while back, my Mum gave me a tub of little blue tiles as she thought I might have a use for them at some point and they have just been sitting around waiting to be used ever since. I counted them all out and discovered I had just enough to create a frame to my image and stuck the individual tiles to a piece of DST. Took a while and a few botched efforts. but I finally got them all on and pretty straight. Now I had a framed mermaid and no idea what I was going to do with it!
I have, in the past had a go at doing a few easel cards but they have always been pretty standard in their construction and I wanted to make this one a little different. I started out with a piece of A4 card and folded it in the usual way, then trimmed it so it would fit the framed mermaid correctly. After rummaging thru my stock of papers and drawing a blank, I suddenly remembered that I had the perfect solution, my Starburst Stains! I have been very restrained with using them as I didn't want to waste them just playing about and not be able to get any more easily, so they have been sitting in a box on the shelf taunting me for months, so I decided to get them out for a play :) I love starburst stains. I got the version in the tubs so I have to daub them onto things rather than spray, so set to work with a piece of card, and used Carpathian bluebells and Maidenhead fern green which is a colour combo I haven't tried out before, and slapped a piece of cling-film over the top and had a squidge about. Luckily in our new house, we have a halogen hob which as Vix has told me in the past is the ideal place for messing about with messy stuff as it is so easy to clean up afterwards, so what it lacks in cooking practicality (I prefer gas hobs) it makes up for in craft use plus it has the added advantage of an overhead light - bonus! Of course, I can never wait for my stained papers to dry out so I gave it a little blast with my heatgun and got back to the project and trimmed and stuck a piece of the stained card to the front of the easel - the weight of the image needed a bit of reinforcement lol
I am always on the look out for ribbons for my various projects and I happened to mention that to my Mum ages ago and she said that she had a bag somewhere in the house, full of ribbons which she had found at my Nanna's house when she died. She's been gone just over 11 years now and when I opened the bag, it smelled of my Nan's house. Loads of memories came flooding back and my eyes were welling up. My Nan was a very talented knitter and crocheter before the arthritis in her hands got the better of her and used to buy ribbons for trimming baby bonnets and finishing off sleeves etc oh and a lot of knitted toilet roll covers too! She tried numerous times to teach me but I could never get the hang of it and it was only last year I taught myself to do a veryy basic crochet stitch and can now knit strings. Very useful, not! In the ribbon bag was lots of different shades of turquoise/aqua colour ribbons and so I ran my needle thru a few lengths to make some flowers - again a first for me! Pretty pleased with the results and finished them off with a punched flower and a gem. I tied a ribbon round the frame which matched the tiles and used another piece of it on the bottom of the easel which I covered with the same shimmery blue paper I stitched the image onto. I made a stop for the foldy bit (technical term) of the easel, as it needed all the support it could get to keep the frame upright out of a piece of the stained card adding a few punches to the corners so you can see the shimmer thru the holes. A few flowers and gems and a bit more ribbon finished it off. Here's a close-up of one of the ribbon flowers, I think it's quite pretty :)
 And another photo to try and show how much the paints sparkle. :)

The Crafts and Me challenge at the moment is for Gems and Sparkle. I doubt I could get anymore sparkle into this if I tried, so I am entering it there. One Stitch At A Time want to see Blooms Butterflies and Blings, and as this had plenty of two out of the three, I have entered it there too. Crafty Cardmakers are looking for Glitter and Sparkle and Craft Your Days Away have Girly 'n' Glitter theme and I feel this fits both of those specs too. PaperPlay Challenges theme is In Stitches so I hope the stitching shows up well on these photos. Really should get out the manual for my camera and learn how to do clear close-ups properly lol
A new craft shop opened at the weekend near where I live and naturally I had to go and pay them a visit. Quite a nice little shop they have there. I was very happy to spot some Twinkling H2O paints as I had seen something similar at a craft fair a few months back and kicked myself for not having bought some then. Much as I love my promarkers and sakura gelly rolls, I love my watercolours too, but have found that I can't always get the sort of effect that I want on my projects. These paints are totally different as they have sparkle :) You can use them in the same way as normal watercolours, blending and watering down to get very subtle shades, as you can see here which is handy as there were only 6 colours in my set.
The stamp I used is a Sweet Pea stamp, Elaine Cox's Little River Mermaid. Now I have seen the name of it again, it makes more sense as I was a little confused why there was a frog on it and no shells! Ah well, just a good job I didn't find any shells to add on as details lol I painted the stamp with the H2O paints and I can only enthuse about how lovely they are. Really nice to use, and the pots look like I haven't even used them so looks like they will last me quite a while. The colour names are really nice too, Pewter, Ginger Flower, Guatemalan Green, Wild Blueberry, Honey Amber and French Lilac (the only one I didn't use this time round). The shiny colours lend themselves so well to a shimmery mermaid. Anyway, I borrowed the stamp from my good friend Vix, so must thank her and give her credit for that. Handy having a craft guru living close-by and raiding her stash occasionally, plus she's been a good friend to me, especially when she looked after my daughter for the night when I was having my last baby!

Anywayyy I digress. Well it is my blog so I can ramble if I want to! The image was taking on a bit of a bluey green theme, so I accented the flowers with pink and added a little glitter. I bought the glitters months ago at another craft fair and I think this is actually the first time I have actually had a dabble with them. Glitter to me takes me back to school days with bigs tubs of PVA and seemingly even larger tubs of glitter. Somehow I always ended up with more glitter on me than on the paper! Much easier to do little details when you have a glue roller pen like I have now. I trimmed the stamp to size and was about to matt it onto the shimmery bluey green paper which I bought in Benidorm a couple of years back, but then I spotted my threads and thought hmmm, a bit of stitching detail would add to the shimmer, so I did a running stitch around the edge which framed it subtlely. A while back, my Mum gave me a tub of little blue tiles as she thought I might have a use for them at some point and they have just been sitting around waiting to be used ever since. I counted them all out and discovered I had just enough to create a frame to my image and stuck the individual tiles to a piece of DST. Took a while and a few botched efforts. but I finally got them all on and pretty straight. Now I had a framed mermaid and no idea what I was going to do with it!
I have, in the past had a go at doing a few easel cards but they have always been pretty standard in their construction and I wanted to make this one a little different. I started out with a piece of A4 card and folded it in the usual way, then trimmed it so it would fit the framed mermaid correctly. After rummaging thru my stock of papers and drawing a blank, I suddenly remembered that I had the perfect solution, my Starburst Stains! I have been very restrained with using them as I didn't want to waste them just playing about and not be able to get any more easily, so they have been sitting in a box on the shelf taunting me for months, so I decided to get them out for a play :) I love starburst stains. I got the version in the tubs so I have to daub them onto things rather than spray, so set to work with a piece of card, and used Carpathian bluebells and Maidenhead fern green which is a colour combo I haven't tried out before, and slapped a piece of cling-film over the top and had a squidge about. Luckily in our new house, we have a halogen hob which as Vix has told me in the past is the ideal place for messing about with messy stuff as it is so easy to clean up afterwards, so what it lacks in cooking practicality (I prefer gas hobs) it makes up for in craft use plus it has the added advantage of an overhead light - bonus! Of course, I can never wait for my stained papers to dry out so I gave it a little blast with my heatgun and got back to the project and trimmed and stuck a piece of the stained card to the front of the easel - the weight of the image needed a bit of reinforcement lol
I am always on the look out for ribbons for my various projects and I happened to mention that to my Mum ages ago and she said that she had a bag somewhere in the house, full of ribbons which she had found at my Nanna's house when she died. She's been gone just over 11 years now and when I opened the bag, it smelled of my Nan's house. Loads of memories came flooding back and my eyes were welling up. My Nan was a very talented knitter and crocheter before the arthritis in her hands got the better of her and used to buy ribbons for trimming baby bonnets and finishing off sleeves etc oh and a lot of knitted toilet roll covers too! She tried numerous times to teach me but I could never get the hang of it and it was only last year I taught myself to do a veryy basic crochet stitch and can now knit strings. Very useful, not! In the ribbon bag was lots of different shades of turquoise/aqua colour ribbons and so I ran my needle thru a few lengths to make some flowers - again a first for me! Pretty pleased with the results and finished them off with a punched flower and a gem. I tied a ribbon round the frame which matched the tiles and used another piece of it on the bottom of the easel which I covered with the same shimmery blue paper I stitched the image onto. I made a stop for the foldy bit (technical term) of the easel, as it needed all the support it could get to keep the frame upright out of a piece of the stained card adding a few punches to the corners so you can see the shimmer thru the holes. A few flowers and gems and a bit more ribbon finished it off. Here's a close-up of one of the ribbon flowers, I think it's quite pretty :)


The Crafts and Me challenge at the moment is for Gems and Sparkle. I doubt I could get anymore sparkle into this if I tried, so I am entering it there. One Stitch At A Time want to see Blooms Butterflies and Blings, and as this had plenty of two out of the three, I have entered it there too. Crafty Cardmakers are looking for Glitter and Sparkle and Craft Your Days Away have Girly 'n' Glitter theme and I feel this fits both of those specs too. PaperPlay Challenges theme is In Stitches so I hope the stitching shows up well on these photos. Really should get out the manual for my camera and learn how to do clear close-ups properly lol
Sunday, 8 August 2010
Flowers and Wings and more sparkly things!
Hello! Not blogged properly for months now due to the house move and struggling to find which safe place I had put certain items of craft paraphernalia in. Have you any idea how much I searched for my DST? lol
Anyway, I'm back, and slowly but surely getting my crafting area back into some sort of order. I'm at that time of year when I don't have any birthdays for a month or so, so had to go in search of challenges for inspiration.

The stamp I chose for this card is called The Lilac Fairy, part of the Flower Fairies from Inca Stamps. It was one I picked up in Hobbycraft and as purple is one of my favourite colours, I couldn't wait to get colouring it in. Using two of my favourite promarkers, orchid and bluebell, I coloured the fairy's dress, wings and the flower heads. For the leaves I used soft green and leaf green and then trimmed the coloured image following the lines. I embossed the wings then stamped and coloured and embossed another set of wings to give a 3D effect. For the backing I ironed some fusible fibres to create a mat and trimmed it with silver edging. Some paper and ribbon from stock finished the card off and then I added a bit of bling with the gems. The green ones came from the states, given to me by my friend who had been out to California and bought me loads of goodies for a fraction of the price for which you can get them over here. The flowers were plain white paper to start with so I coloured them with matching promarkers and added the gems for the centre.
The Crafts and Me challenge at the moment is purple and green and I would say this card fits the bill :-) Flutterby Wednesdays as ever ask for something with wings, but this time they want to see your favourite colour too, and as mine is purple (bet you thought it was red, no red is just my obsession!) I have entered it there too. Creatalicious Challenges wanted to see some 3D, and I think these wings really stand out. Sir Stampalot's challenge for this month is Bring on the Bling and this one certainly has a bit of that! Finally, as this card is cute and girlie I am entering it over at Creative Card Crew :-)
Tuesday, 27 July 2010
Sorry I've not been around much!
We moved house at the end of May, which was stressful enough in itself with 4 kids in tow, despite only having moved 300 yards round the corner. We did it all ourselves just using cars as I refused to hire a van for that short a distance! Well, we're all in and settled now, it took over a month for us to get reliable internet access back and my craft area looks like a bomb has hit it! There are still bits and bobs in various places in the house which have not yet found a home and most of it seems to have ended up in the middle of my craft stuff, 'Oh Sarah will know what to do with this, I'll just leave it here for her to deal with rather than put it away myself.' Grrrrrr lol
Ah well, mustn't grumble. The new house has a lovely well lit front room which has been mainly taken over by all my craft fings and I have only managed to do a couple of cards and things for people and I really should get more blogging done. But I do have a good excuse for not having done much, not only did we move house, my baby boy turned 1 and we had his naming ceremony on the same day and wehad a handfasting too! So I am now married (but not legally recognised) lol
Ah well, mustn't grumble. The new house has a lovely well lit front room which has been mainly taken over by all my craft fings and I have only managed to do a couple of cards and things for people and I really should get more blogging done. But I do have a good excuse for not having done much, not only did we move house, my baby boy turned 1 and we had his naming ceremony on the same day and wehad a handfasting too! So I am now married (but not legally recognised) lol
Tuesday, 11 May 2010
Shimmery wings and sparkly things
I had a great day out on Saturday at the stamping fair in Port Sunny. Never been before and I can heartily recommend it. Loads of stamps, inks and other bits and bobs for crafting, brill! Saw some lovely watercolour glimmer paints on one stall, but didn't buy them as I am going to treat myself to them next time, besides I wanted to buy some other shiny things so had to save my money til I found them. And boy did I find them. Vixykins was demoing on The Stampman stall with Starburst Stains and I honestly don't know how I have coped so far without getting some for myself. They're fantastic! I couldn't wait to get home and try them out. Bought a few new rubber stamps, namely some fairy ones from the same stall and some butterfly ones from another. I've never had a decent sized butterfly stamp to use before and I had decided that I would have to buy one at the fair. Got a lovely set too. Bought a couple of spray bottles of cosmic shimmer mist in red and pink too. Oh and I bought a few more promarkers (ok about 20 more) and a tub of gilding flakes in variegated red, though I didn't have a clue what to do with them, they were just soooo pretty lol In my investigations online as to what I could do with them, I found out about angelina fibres and films and was very happy to find a pack in the QVC shop to have a play with. They also gave me the perfect way to stick the flakes onto my work. Yay!
 So onto this card. Having been playing with starburst stains and making some very pretty backgrounds I decided to have a go with the cosmic shimmer mist using the same techniques. The red and pink go together beautifully, and with a bit of clingfilm scrunched on top, it gives a lovely distressed silvery glimmery veined effect on the surface when dried. Once it was dried out I set to work with a couple of fairy stamps out of the new pack with my new pad of jet black StazOn ink. Was pleased with how well it worked on the shiny surface as my previous experience trying to stamp on shiny bits had been a little bit trying lol But it worked this time and it dried quickly so all was good. I spritzed a couple of fabric flowers to coordinate with the background and added a couple of gems to the centres to add that all important bling. I stamped out a butterfly on some of the remaining shimmery paper and added some gilding flakes to add accent, cut it out and stuck it to the corner with good old DST. I had bought some netting from a wedding favour supplies shop a few weeks ago and cut a piece off, ruched it up and stuck it together with a bit more DST and a lot of luck. I used a bit of the trim off of the net to created a 'swoosh' between the flowers and the butterfly with a bit more of the gilding flake for good measure. It was finally beginning to look like a card!
I tried setting it on a white background but it just didn't look right, didn't look right on plain black either so I set to work once again with the glimmer mists and a piece of black card and wow! How fab do they work on black?!? Gave just the effect that I was after. The newly acquired pack of angelina fibres was calling to me so armed with iron, greaseproofed paper and a couple more gilding flakes I created a lovely shimmery background to set the whole thing off. So now I had a topper of card, backed with net, backed with angelina fibre to stick onto a shimmery card, a liberal squidge of tacky glue on the back and a night spent under a heavy book and it all holds together. Wooo! :-)
Entering this over at Crafts and Me Challenges who want to see Sparkle, I think this card has a bit of that! Also Flutterby Wednesday want to see a butterfly, By The Cute and Girly - Celebrations (well I was celebrating using the new stuff I bought and I will be using this as a birthday card also as the card has a Distressed! air to it I am entering it over at Crafty Cardmakers. Sir Stampalot's challenge is for Butterflies and Blossoms and finally Creatalicious Challenges - Flowers and Wings (also a DT entry).
Saturday, 24 April 2010
A bear's home is his castle
Well, I have really gone 3D this time! I started with the Pixie Dust Studio's DT challenge image, Wink the bear, whom as was said on the site was getting his castle ready. This bear needed a home! As it was St Georges Day when I started on this card, I had dragons and castles in mind so a castle was definitely on the cards (pardon the pun!). As is usual, I come up with these ideas, inspiration runs away with me and I then put my mind to working out how on earth I can put my plans into reality.
Firstly I coloured the image in browns for the bear's fur, then reds for the robes as bearfitting (sorry!) a bear of royal blood. I then drew some rolling English hills and topped the most distant one with a castle, flags flying at full mast as their King is home! I then cut the image with my circle cutter and made a frame out of grey textured card and drew on the brickwork. To add a bit more depth I cut out part of a circle, cut a flat side to it and made it into a crenellated balcony for our King to stand on. Now I needed to build a castle structure to home King Bear. Really must learn to think these things through before I come up with smart ideas!

I took another piece of grey card and measured out where the crenellations of the castle ramparts would lie, and cut them so they sloped down the card, adding a very strange sense of perspective to the card structure once assembled. I added brickwork onto the card so that as it stands up, you can see brickwork like you would see on the inside of a square tower if that makes sense? I added a cardboard hinge to attach the front image onto the castle and made a latch to secure the image on the other side of the castle 'tower' so it all stands up. I think it works, lol. I had to take the photograph from a strange angle to try and show the detail on the front and the castle structure, hope you can see it truly is a 3D card and can probably just about make out the latch on the lefthand side which holds the whole thing together. :-)
Tuesday, 20 April 2010
A birthday comes around...
...but once a year. OK cheesy gag, but it was my inspiration for this card! For ages, I have struggled with cutting out circles as they have always gone wrong somewhere in the cutting process and ended up looking a bit lopsided and mis-shapen. Not any more! Was wandering round the QVC outlet shop craft section and lo-and-behold, what did I find but the We R Memory Keepers magnetic cutting mat complete with circle cutter, and a bargain at £13.15 once the discount had been deducted. I usually go there to kill some time whilst my son is in pre-school, but once I bought it I had to head home to play! It really is a fab bit of kit and is the mat designed to go with the WRMK interchangeable cutting head paper cutter ruler I bought last week, the ruler clings magnetically to the board and makes cutting fancy edges to paper soooo much easier (easier with the proper mat than stick the ruler to my regular mat with DST anyway lol)
I am very fond of Tiddly Inks digi stamps, and the one I have used here is 'Annie', a freebie image which was given to all the members of Christy's PCP page to use to create a DT entry. I tried and failed :( but really love the image and it was the first digi I actually coloured with my promarkers so I have a bit of a soft spot for it. I coloured her for this card using cocktail pink, tan and buttercup promarkers and then got a bit carried away making circles and thought hmmmm better work out what I can do with them. Annie looked rather sweet set behind a circle border of pink, so I glued and trimmed the image to the same size as the pink circle and then used a nice buttercup yellow sheet of card to make a bigger circle, and stuck it all together. It looked to be a combination between a side plate and a frisbee so I figured I had better come up with some ideas of what to do with it now!

Due to my previous lack of skill at cutting circles, I have never worked with them, so it was full-steam ahead to discover what I could do now. Determined as I was to make a circle card, I cut out two more circles to make the 'back' of the card and then punched some holes in, added some pink eyelets and went to rummage through my ribbons bag. I wanted some pink, yellow and brown to match the image and hit lucky with some pink and yellow, but had no brown. Then I spotted it, the brown twisted cord I have been hoarding in my craft drawer for ages with no particular purpose and I had the missing item I needed. Woohoo! Threaded the three ribbons through securing the front and back together and tied them into a bow, added a pink skeleton leaf and a yellow butterfly to make the card really stand out. Had a dig in my gems box and found some pretty pink and yellow gems which I stuck all round the edge to add a bit of bling. Then I stood back and thought, oh pants, it's round, it's heavier on one side than the other and it doesn't open like a conventional card. IT'S NEVER GONNA STAND UP! AAAAARRGH!
Racked brain and decided it would have to go on a plate stand or something similar, remembered I don't have any plates which need stands and went on a mission to find a plate stand I could make out of card, and to my surprise, I found one and it works.
Think I need to go and lie down now... oh but first I will have to hide the card from my kitten who was trying to help out at the ribbon tying stage and I am sure would love to get her paws on a floaty butterfly topper!
As I have used no other colour but pink, yellow and brown, I am entering this in the Crafts and Me Challenge of the same colour scheme. Tiddly Inks have an Anything Goes challenge at the moment so I have entered it there too.
Subscribe to:
Posts (Atom)