Wednesday 20 April 2011

Gothic pin-up girl

There is just something about the whole gothic style of dress that inspires me.  This probably stems from having grown up in an era where the likes of The Mission, Sisters of Mercy and The Cure reigned the charts and the dress-code for that type of music was out of this world.  Long flowing coats, long flowing locks, make-up, long boots, bodices, waistcoats....  It's all just so dark and brooding and fab! I like to think I was a goth at some point in my life (my sister will tell you different tho lol) but the most goth I got was dying my hair black and dressing in black all the time and a bit of dark make-up.  Well apart from the last bit, what has changed as I am sitting here with dyed black hair and dressed top to toe in black? Oh that and the girls were always skinny and tall, neither of which I have ever achieved Hehe!

The image I have used is a fantastic artist I have found called Teri who sells her digi stamps under the name Delicious Doodles.  I found her art when I was looking for some steampunk digis and I fell in love with this one.  A true gothic fairy!  I have coloured her with a combination of promarkers and prismacolour pencils to make the wings 'pop' out.  The background behind the image I created by running some coredination red/black paper through my sizzix in an embossing folder, then sanding it gently to bring the colour through and then distressed the edges a bit more with another session with the sandpaper.  The swirls are Tim Holtz diecuts which I had cut out in red then attacked with some shimmer mists.  The main background is a black shiny crocodile skin paper I found in a Anna Griffin papers set and I thought it was just perfect to go with this theme.  The flower I made myself with a spare scrap of the background paper and a smaller flower made out of the coredination paper, run thru a snakeskin embossing folder then sanded off again.  The centre is a brad.

I think I might have got a bit carried away with my set-up for the photo of this card with the candlesticks, rose and wand, but I felt they just matched the gothic theme so well!

I would like to enter this card into the following challenges:

Haunted Design House - Gothic Pin-up
OSAAT - Make It Sassy
Simon Says Stamp - Emboss It

Monday 18 April 2011

Love is in the air?


I think you would have had to have been in hibernation for the past few months to have not realised that there is a Royal wedding at the end of this month.  Everywhere you look someone is flogging something to do with it, there are posters advertising events at pubs on the day and we have all been given an extra day off!  The extra day off is the highlight of it all for me, I don't really give two hoots about the Royal family to be perfectly honest.  Looking at some of the photos of Kate Middleton from prior to the engagement, and then after the engagement, nobody can deny she is a pretty young girl, but already the Royal machine is in motion to turn her into a fuddy-duddy who dresses like a 50 year old woman at a WI tea party!  Look what happened with Diana if you don't get what I mean.  She was only very young when she got engaged to Charles and in a lot of the early formal photographs she looked like she had been dressed by her Grandmother!  The people I really feel sorry for are any couples who have had the same date picked out for their own weddings for the past couple of years (you would possibly not believe how far in advance you have to book to get the church, the venue, the cars all on the same date etc Then your whole day gets hijacked by the Royals! Meh!

Anyway, moving swiftly on as they say....

I haven't been to an actual wedding for years, apart from evening dos.  The last wedding I went to I think was my ex sister-in-law's wedding in 1999!  My daughter was only a couple of months old at the time and it was an unusually hot day for the beginning of September, I was still breastfeeding her, she was getting restless because she wanted more grub or to go to sleep (probably both!) and my deranged old bat of a mother-in-law (which is what her darling son used to refer to her as) was insisting that I had to hang around until the photographs had been done.  The photographs took the best part of two hours, I was only called to be on one of them and I never actually saw the finished album.  So what was the point of putting me and my daughter through all that discomfort!  Oh, I am still ranting.... oops!

Moving on again... lol  *Thinks happy thoughts of love and harmony*

As I haven't been to a wedding or known anyone who has got married since I started making cards, I have never actually made a wedding card in my life.  Remembering back to the ones I received at my own (FAILED) wedding, they were all white with wings and toasting champagne glasses and pretty little doves.  Over at Crafty Cardmakers this week we have a challenge for red, white and blue and/or a wedding card so I have chosen to do both.  The image is one that I asked Vix to print out for me and I have coloured it simply with red and blue (with grey for the trousers) promarkers with a touch of gelly roll shimmery pens here and there.  It's a good thing that a lot of brides get married in white as it made it VERY easy to colour her dress... there was the white without me even having to lift a pen lol  I trimmed the image to size then used my hearts corner punch and back onto red paper so the hearts show up in a nice way.  I have followed the sketch from I Love Promarkers as it was just perfect for my plans for this card.  The 'congratulations' design paper is one I made myself in good old MS Paint.  The satin look paper is a free one I found whilst trawling the net in search of something to match my image.  See I usually do it this way round which is why it was so unusual for me to plan ahead and key my colours in with the DP on my previous post!  I have backed each of the panels with red and added some red gems for a bit of bling and a paper rose which I re-coloured with berry red promarker to match the flowers and bits and bobs on the happy couple.  I think I have kept this pretty clean and simple really.

Well I hope you enjoy the extra day off, whether you spend it tuned to the box with one of the Dimbleby's droning away (or whoever the Beeb pick this time), having drinks in the local pub or maybe just spending some time with family.  Enjoy!

*Hugs*  Sarah

I would also like to enter this for the following challenges:

Happileigh Scrapping - A Royal Challenge
Polka Doodles - Tie The Knot

Bunny in my pocket

Our challenge over at Dream Valley is to create something to do with Easter, and what could fit the bill better than a bunny?  Cute little chap isn't he?  I'm not sure where I picked him up but I think it was a spring freebie last year, so if anybody recognises him, could you please let me know? LOL

I have coloured him with promarkers and, although it hasn't shown up very well on the photograph, I coloured it a few more times and have paper pieced it to make it a little 3D and Digi Design House want to see paper piecing.  I have followed the sketch at The Sweet Stop which has a bit of a twisted theme this week, hence the angle, and wanted to see something with wings and the butterfly fits the bill there I think :)  The 3 design papers I have used are from my stash, not sure what any of them are as I found them all in little leftover bits during a paper sort-out.  I bought a set of drawers to organise all my papers and somehow I still have a box cram packed full of odds and sods.  How does that work? *Confused face*

The flowers are from a set my other mum got me on one of her trips to the states.  I'm not usually a pink person and so haven't used many of them before, but I think they look just fab stacked with the gems in the centres.  The brackety bits are using one of my nestie sets and cut from some paper I made a while ago and the ribbon strips are Kanban I think and the meshy ribbon in the background is from the big roll I bought a few weeks back - see I said you would see it again didn't I? lol

I made the sentiment using a scalloped nestie and a peel-off (shhhh) which I coloured in with promarkers to match the image and then doodled the flowers, faux stitching to tie in with the main image, and the text freehand.

Thursday 14 April 2011

Passion for Purple Promarkers

When I am an old woman I shall wear purple, with a red hat which doesn't go and doesn't suit me, and I shall spend my pension on brandy and summer gloves, and satin sandals, and say we've no money for butter ~ Jenny Joseph (I love this quote!  It's so ME! lol)

If you were ever to visit my house or look in my wardrobe, or indeed view the photos from my handfasting, you would probably be thinking that my favourite colour is red.  Well you would be wrong.  One of my lesser known secrets is that my favourite colour is purple.  I have always loved purple.  It's just such a lovely colour and there are so many variances in shade, plus with my dark hair colour and anaemic complexion it is one of the colours that adds colour to my pasty white skin and doesn't leave me looking washed out.  Oh and it usually looks fab with my green eyes! ;-)

The stamp I have used is ching-chou kuik's Dark Royalty from Sweet Pea.  Yes, it's another Sweet Pea!  I just love their stamps and as purple is my favourite colour it fits the In a Sweet Pea Dream challenge.  I have coloured using a range of promarkers in shades of purple (my favourite) and green, and for once, I chose my DP first and then coloured the image to coordinate with the colours in the paper.  This may not seem unusual to many people, but believe me, it is highly irregular for me!  I usually set about colouring an image and then discover that I have no paper to match and have to reach for my stains and shimmer mist and create my own.  Well as you can see I have actually used a panel of my own, which was made with shimmer mists then embossed with a polka dot embossing folder.  Felt quite strange to be so organised for once!

I was so organised, I even sat down and made all my embellishment flowers, as challenged to do by Passion for Promarkers, to match. I had a great time with my coffee filters and stains and heat tool. Made a batch of 3 large flowers - 2 turquoise and one purple, and 4 small purple flowers, all with gems and pearls in the centres with the full intention of using them all, but I went downstairs this morning to find der der der! No small purple flowers... seems my dear cat has been playing with them (I found one of the turquoise flowers in the bin next to my desk).  But now I am worried as the rest are nowhere to be seen and he has a habit of eating random thinks so he is possibly going to pass some very interesting poop... cats, grrrrrr Anyway, the few flowers he had left me to decorate my card with had escaped intact.

I have assembled this card following the sketch at The Sweet Stop as the moment I looked at it I could see all the papers I had planned coming together, great when I plan eh?  The main design paper with the large purple flowers on it is one I picked up in my local craft shop and even though it came in a pack of 10 sheets of the same paper, I just had to have it!  Might take me a while to use it all though...  The DP on the circles behind the flowers and the bracket at the bottom is from a Laura Ashley set.  The panels are either trimmed with purple paper or with purple edging borders to coordinate with the image and papers. Oh and then I added a couple of turquoise gems to finish off.  The colour scheme fits perfectly with Sketchy Colors challenge for turquoise, purple and green too :-).  I hope my gems will pass for pearls for the Magical Monday Challenge too, the card would have had lots more pearls if it hadn't been for my darn cat lol.  This is probably going to end up as a birthday card for one of my mothers so hope it fits in ok at Sweet Pea Stampers as it is a feminine card and uses a Sweet Pea image.

Wednesday 13 April 2011

It's a bit bright...


I've been having a fiddle about again!  I recently discovered that the box of coffee filter papers I had stashed away at the back of the cupboard (left over from the time we had to use an old style coffee machine whilst awaiting for the arrival of a new jug, following a toddler induced accident with the old one) can actually be put to good use in craft.  Yay!  They make the most gorgeous flowers and are pretty easy to do, especially if you have a suitable scalloped nestie as do I.  The first one I made, was huuuge and may well end up as centerpiece for a card at some point but once I had mastered the art, I became a little addicted and keep churning them out.  Well you can never have enough flower embellishments when you're into crafty stuff now can you?  Whilst the regular unbleached ones are good for darker colours, they aren't so good for lighter colours as the 'beige' effects the colour of the flower.  However, a quick search of t'interweb found me a supply of white ones, 400 of them in fact, and the colours that you get from those are much more delicate.  The first batch, which I used on this card, are made with the unbleached filters and cosmic shimmer mists.  They came out really well with the purple and green I had, and the mica shimmer looks lovely on them. They are held together with a tiny little brad and have a nice diamond pearl in the centre.  I enjoy making these so much that what the hey, I think I am going to do my first ever tutorial on them!

The image I have used on this card is Sugar Nellie Web Knitter.  Coloured with promarkers and a bit of sparkle added to the leafy wings with cosmic twinkles. The DP is from my stash and the coloured papers are from my ever dwindling supply of Paper Mill papers - why oh why did you have to close your shop near me? :-( Anyway, the image was trimmed to size with a nestie and I used a scalloped nestie cut in purple to create the frame. The challenge at The Sugar Bowl is to use purple and green, a sketch and one of their own images so a check in the box on all three counts I hope.

Happily, during one of our crafting and gabbing sessions, Vixykins brought round a big Tim Holtz swirly scrolly sizzix die cut which I used to cut out some swirls in an array of colours, so I have used some paper made from purple and green cosmic shimmers spritzed onto card, which is actually the same mists I used to create the flowers.  With the pearls and swirls and magical theme I hope this one fits the challenge at Magical Monday :-)

It was quite difficult to photograph this as the shimmery bits seem to nab the colours out of the image a little and are making the paper look a little blue but they are purple, honest!

Monday 4 April 2011

Spring fever

It's spring fever. That is what the name of it is. And when you've got it, you want - oh, you don't quite know what it is you do want, but it just fairly makes your heart ache, you want it so! ~Mark Twain


Spring is fab!  Out in the garden, things are blooming and adding lovely colours to everyday life.  As we only moved to this house at New Year, I didn't get the chance to put any bulbs in, but I was thrilled when green shoots started poking through the ground and was hoping that they would be daffodils, and they were!  The bright yellow colour is so cheerful and if I could just stop my 3 year old son beheading them and bringing them to me, the garden would be full of them!  Ah well, I'm sure he will grow out of it... and then my younger son will start lol

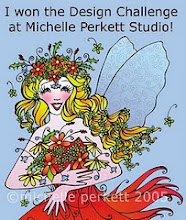
The challenge over at Crafty Cardmakers this week is to use mainly yellow and these 3 embellishments stitching, rhinestones and ribbon, so a springtime card was just the perfect idea to fit.  I used a Sweet Pea Stamp, Jennifer Nilsson's Daisy Flower Fairy which I coloured with a range of yellow and amber promarkers and gold star gelly roll pen to add sparkle to the wings of the fairy and the bee.  I added a couple of orange rhinestones as earrings and then I couldn't decide what to do with it.  I knew I had yellow cards and things, but I couldn't think what to do next.  After a bit of a head scratch, I remembered back to a conversation I had with Vix during our Promarkers in the Park session last week and recalled that she had mentioned about twisted easel cards.  I have never done one before, so I decided to have a play with some card and see if I could do it... then decided to go two steps further and turn it into a triple twisted easel card!  It wasn't as difficult as I thought it would be, but is soooo effective don't you think?

The three panels are backed with some backing paper I made myself using yellow card and my new favourite friend, my I-cling flower stamp, stamped and embossed with orange, then diecut with my trusty old friend, my deckled rectangle nestie.  The main image was trimmed with the second largest nestie and then matted to one of the bigger diecuts.  For the front panel I printed the sentiment 'Just for you' in orange using my printer, then embellished with paper flowers I had coloured to match and added some opaque amber rhinestones for the flower centres:

I then added some faux stitching around the images with a black sparkle gelly roll so the 'stitches' would be more subtle.

For the back panel, I used the Mark Twain quote shown at the top of this post (just in case you can't read it on the photo):


The foldy bits (god I'm technical) I covered the visible side of the fold with yellow gingham paper which I had printed off from a freebie site.  For the stops for each part, I used a large flower, adhered with a sticky pad and teased the petals up so that they provide a firm stop.  I embellished the main part of the card with some yellow ribbon from my stash and was thrilled to find it matched perfectly without my having to recolour it! Yay!

What's more, the whole card folds flat so it will go in an envelope, which is always handy in the case of a card ;-)

On that matter, I would like to enter this in the following challenges:

Quirky Crafts - Twisted Easel (Hope a triple twisted easel counts!)
Paper Sundaes - Spring Blossoms (I think it certainly has a few of those!)
Basic Grey Challenges - More than one fold (check! lol)
In A Sweet Pea Dream - Hello Spring (I'd say there is more than just an element of that!)
Sweet Pea Stampers - Pack a punch (ANOTHER Sweet Pea from me - anyone would think I was addicted lol)

My other Mother...

I'm quite a lucky girl really as I have 3 people who I think of as 'Mum'.  The first being my Mum, always been there for me (despite a few dodgy patches, she has come through for me) and naturally I do her a card each year.  I have already done her card, it's the green one with the teddy on it.  Then there is my partner's Mum.  Her's is the lilac fairy.  So that just leaves one Mum to make for, and that is my ex's Mum, Jean, my elder son's Grandma.  Since my son was born she has been there for me 100% of the time.  She's helped me out wherever she could, listened to my happy tales and been there as a shoulder to cry on when I have needed one and been the best possible friend I could ever hope for.  She's going through a bad time at the moment herself as her Mum has been diagnosed with cancer and as she is an elderly lady we're not expecting her to be with us much longer, so I wanted to make a special card for her this year to let her know we're all thinking of her at this hard time.

The image I have used is a Sweet Pea stamp, Ching Chou Kuik's Ladybug.  Isn't it just adorable?  I really loved colouring this one with my promarkers and I worked with a few different red pens and a touch of blender pen to create the shiny wings. The flowers are coloured with antique pink and amber with various yellows worked in.  The leaves are leaf green with emerald and moss green.  I trimmed the image with my deckled nestie and then had a rummage about for a piece of paper I had made with starburst stains ages ago, cut that with the next nestie size up and ran it through my sizzix in a flowery embossing folder.  Because Jean (who makes cards herself) is very much a perfectionist, I deliberately set the main image off at an angle, mainly because then I wouldn't have to panic about getting it straight lol

I made my own design paper for this one, choosing a simple flower and stamping it out with orange versamark ink.  I love this stamp, it was only 99p in Hobbycraft and is a Cling-it one.  I then embossed in gold some leafwork in a band across the centre and added some see-thru gold ribbon diagonally across the centre.  I used one of my new nestie shapes to cut the scrolly bit out of a bit more of the paper I had useed earlier and coloured some paper flowers to match the colours of the flowers on the main image.  The smaller flower was already an amber colour but I tied it in a bit more with a few touches of antique pink.

To make the card personal to Jean (as it doesn't seem right putting Mum on the card!) I added her name in gold to the bottom of the image.  I then finished with a couple of red gems.

I would like to enter this for the following challenges:

Off the Wall Craftiness - Colour inspiration - this is where I chose the colour scheme :-)
Passion for Promarkers - Bugs
PaperCrafting Journey - For the Ladies in Your Life
Sparkles Forum - Springtime
Paper Sundaes - Spring Blossoms
Creative Inspirations - Mother's Day
Sweet Pea Stampers - Pack a Punch
In a Sweet Pea Dream - "Hello Spring" Sweet Pea
I Love Promarkers - Emboss It

Sunday 3 April 2011

Pretty things with wings

As I said in a previous post, I have 3 Mums who I make cards for each year, and this is the second one!  I made this one for OH's Mum and as her favourite colour is lilac, I chose that as it is also a lovely springtime colour.  The challenge over at Dream Valley this fortnight is Things With Wings and this beautiful butterfly fairy fits the bill perfectly.


The image I have chosen is a wonderful one from Michelle Perkett which I was lucky enough to win in a challenge last week :-)  She is called Lilly The Fairy of Enchantment and isn't she just stunning?  I love the simple posy of flowers she is holding and those beautiful wings.  I have coloured her with promarkers on some fantastic paper I have found.  It's really good for promarkers as it doesn't bleed at all so you can really work at blending without worrying about fuzzy lines or putting a hole in the paper!  You can also print digi stanps on it with great clarity and printable design papers come out fab too.  I printed the design papers on it and you really cannot fault it.  These papers were just free to download ones and came out of the printer looking really professional so I was really pleased.  I edged round the whole stamp with a grey promarker and then trimmed the image.  I used a scalloped circle nestie to create the 'frame' round the sun, trimmed the design papers to size and then edged with some silver butterfly peel-off borders.  There I said it.  Peel-offs.  I used peel-offs.  I now expect to be drummed out of the DT lol  Well, they were needed to add a bit of bling so :-p

The sentiment is another peel-off (mwahahaha) on a deckled rectangle of the same lilac card I used round the main image and 'secured' in place (well I actually stuck it down with DST) with a single butterfly.

I would like to enter this for the following challenges:

Sketch and Stash - Sketch
Michelle Perkett Challenges - Flowers
Wee Memories - Favourite Colours