Thursday 24 March 2011

Bursting your own bubble

We live in a strange bubble. Brian Molko


There have been times in the past, whilst suffering with depression, I had described life as like a bubble, or living within a goldfish bowl and feeling everyone was looking in and observing me like I was a ruddy big goldfish or something.  Then, one day, the bubble burst and I was able to breathe more freely and see myself and my surroundings for what they really were.  I made some big life changes and have never looked back.  I am happy, I am loved and I love.  Most importantly, I stopped caring what other people thought of me and decided to be happy within myself and focus on the more important things in life.  Having fancy holidays and financial security does not shape my life at all now, instead I am happy with what I have and am surrounded by people I love and that is what truly matters in life don't you think?

I love trying something different and learning new skills and being into crafty things, this soft spot of my personality comes in very handy indeed.  I take inspirations from anywhere and anything and if I spot a technique or style I like, I am away to my craft desk to try and emulate it and master whatever it is.  One of the card styles I like is foldy cards.  I have done quite a few easel cards in the past year and ventured into trying different sorts of folds, but I spotted a different sort of fold on my travels and decided to have a go myself.


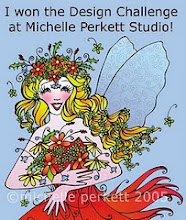
The image I have used is Michelle Perkett's Princess Oceana, a wonderful digi stamp I chose as part of my prize for a challenge I won.  Isn't it just fab?  I love the way her hair can be coloured in more conventional colours or totally differently in blue tones like I have done here.  I have used my newly acquired technique of colouring dark to light with promarkers and I think it looks like waves of water.  Well that was my intention anyway!  I trimmed her using my favourite deckled rectangle nestie and then cut a bigger one with brown paper and sprayed it with white pearl shimmer mist.  The spray adds an almost water bubbles effect I think.  I then added a couple of clear blue gems to the corners of the image.

The base of the card I folded to create three waves using dark blue card which I had sprayed with white pearl and it has come out looking like a myriad of tiny bubbles which was perfect for my plan for this card.  The papers on each wave are from stock, I can't remember where I got them from, sorry (though I think it might be papermania?) and were cut to leave a border visible on each wave to show off the effect on the card.  I think the papers look quite shell like and fitted in wonderfully with the blue and brown theme I had planned.

The next bit was a new idea to me, incorporating acetate into a foldy card... wasn't sure if I would be able to do it, but it worked.  I always worry when I do a foldy card that the recipient won't be able to stand it up on display as not everyone in the world knows what an easel card is.  Here I have used a piece of acetate sheet stamped with silver bubbles and cut to size to hold the whole thing together, so when it is folded into an envelope, it will come out and almost pop up so it will be obvious how it stands up!  The acetate is secured to the card with brads so no glue or tape is visible and therefore can't come undone (another of my fears of sending cards through the post - the recipient opening the envelope and random pieces fall out loose).

I would like to enter this into the following challenges:

Michelle Perkett Studios - Colour Challenge Blue and Brown
Fab 'n' Funky Challenges - Do it more than once (more than one fold)
Karen's Doodles - Challenge 55 More than one fold
Shannon's Sentiments - Unusual Fold

Monday 21 March 2011

Coming of age

The challenge at Crafty Cardmakers this week is special birthday so I have done this with my stepson Sean who will be turning 18 very soon in mind.  If there is any one thing any self-respecting teenage lad who comes of age will be thinking about that is drinking beer (legally!) so I have used Victoria Case's 'Heidi' digi stamp as I felt it was just perfect for the occasion.


Cards for men are always so difficult I think.  You can't have any gems, flowers, glitter or anything blingy at all really!  Any inspiration you find is boats, cars, fishing, computers, football or beer.  With it being for an 18th birthday and 18 being the age you can legally drink in the UK, beer was the obvious choice.  A nice buxom young barmaid holding two glasses of beer pretty much has to fit the bill for an 18 year old lad really!  I have coloured with promarkers and mastered the art of colouring dark to light which was a bit of a mindshock but I think I managed it.  I used Meesh's tutorial as it actually uses the image I was planning to use.  I cut the image to size and trimmed the corners with my corner cutter and backed onto some paper I had made previously with some of Tim Holtz's Adirondack Color Washes as the colours matched the image.  Then I had a bit of a brain freeze and couldn't think what to do with it!


So, I consulted the man in my life, Sean's Dad!  He came up with the idea of a beer glass shaped card and I just looked at him horrified at first, then the idea grew and I sketched a template and this is what I came up with.The 'glass' is coloured using the same colours as the beer glasses on the image and accentuated with a white highlighter to make the glass look a bit more realistic.


I'd like to enter this in following challenges:


Magical Monday Challenge - Use a shaped card
One Stitch At A Time - Something for the boys

Going green for Mother's Day

One of the cards I like making each year is Mother's Day cards.  I have three Mum's who I send a card too so if you see some more cards popping up, that's why.  I have my Mum, my partner's Mum and my son's Grandma who has been like a Mum to me the past few years, and I make a card for each of them.  I make them all different so three lots of Mum's make for three different challenges lol  Anyway, this is for Mum No. 1.  I haven't decided which one it is going to go to yet!  This weeks challenge over at Dream Valley Challenges is Mother's Day so I have the perfect excuse to make the first one.  Why not pop over and have a look, it's a new challenge blog and we're all very friendly!

The image I have used for this stamp is Tiddly Ink's Mother's Day freebie and I think it's just so cute!  Their challenge is Lucky Me and green is supposed to be a luck colour isn't it?  I have coloured using promarkers, tan, cinnamon, antique pink and ruby.  I have then cut it out using one of my x-cut oval cutters.  I have followed the challenge sketch from A Spoonfull of Sugar and have used a selection of bought green-based papers to build up the card, the dark green paper at the very back I made myself using a stamp, embossing powders and inks.  The ribbon is from stock.  To tie everything together I have used faux stitching around all the different pieces and also on the letters which I cut using my sizzix.

I would like to enter this for the following challenges:
A Spoonfull of Sugar (link above) - Sketch
Tiddly Inks - Lucky Me
Crafty Catz - Mother's Day
Crafty Purple Frog - Going Green

Sunday 13 March 2011

Make your own fun

Sometimes when things are getting you down it pays to make your own fun.  Making your own backgrounds definitely constitutes my idea of fun as it gives me the chance to not only be creative but usually to get my hands messy!  And boy do I get them messy!  The DPs for this card were created using Tim Holtz' Adirondack Colour Wash sprays in stream and raisin colours over an embossed in lilac over some Inkadinkado stamps.  Lovely strong colours but about as messy as it gets.  My hands have been looking either bruised or gangrenous in lovely shades of red, blue and green.  But they're addictive and I can see I am going to end up buying some more soon.  The ones I have came at the bargain price of £2 each from my local art shop who have a sale table where they will sell on stuff other crafters have finished with and I have picked up all sorts of bargains there - these were an especially good bargain as they were brand new, unused and 2 of them even had the seal still intact!  My daughter nearly disowned me as I did a little happy dance when I found them!  The spotlight over at Crafty Cardmakers this week is on making your own design papers, so if you fancy making some of your own, have a go and come over and join in!


I have used ching-chou kuik's Black Rose Fairy coloured with promarkers for the main image which I trimmed with my trusty deckled rectangle nestie.  Behind the main image there is a piece of paper which was made using the same colours, but then dry embossed and rubbed over with embossing ink then sprinkled with moonglow powders to give it a little sheen, then trimmed with my largest nestie to created a border effect behind the main image. The prima flower came from a pack at QVC outlet (half of them were missing so I bartered and got them cheeeeap) and the ribbons are from Hobbycraft in the sale.  Got a big roll of it and I love the colour so expect to see it in use quite a bit!


I hope this fits the following challenges:


Lawnscaping - Use stamp in unconventional way
Crafty Purple Frog - Things with wings
Southern Girls - Use Flowers
The Sugar Bowl - Sketch, spring, try something new
Jac-Inks - Technique Challenge - Masking


Saturday 12 March 2011

The Big Bang?

Depending on whether you are an evolutionist or a creationist, you will either believe the Earth and the Universe were created by a big bang or you will believe it was created by some higher being.  I am of the former school of thought!  I went to school and studied sciences and have seen and heard far too much since to believe that life as we know it was created by anything other than a chain of scientific phenomenon. So when the challenge at Dream Valley Challenges was 'New Beginnings' I decided to try and think outside the box and steered away from birth, marriage and home moves and come up with something a little different.

I started this project off by stamping some circles and swirls using my clear acrylic stamping block and my Inkadinkadoo stamps using clear embossing ink and then sprinkled silver pearl powder over dusted off and embossed.  I don't think it matters what colour you use as long as it is a light one (which I will explain in a bit). I created the background using Tim Holtz' Adirondack Color Wash sprays in stream, raisin and pesto.  I wet the paper first and gave a quick blast with the 3 colours to create the background.  Just love the way all the colours merged and swirl about and create a quite random design on the paper but they are so damn strong!  I ended up with a left hand looking like I had early stages of gangrene and pretty blue cuticles when I first tried them out.  The lesson of the story here is to use gloves but I can never find a pair when I need them and like to get down and dirty with dyes so invariably I end up with multi-coloured hands (it washes off eventually lol). Anyway, moving on.  Once the inks had been dabbed off a bit (Usually get very strongly coloured pools of ink, hence the multi-coloured hands problem) I heated up my iron to it's highest setting.  I use a normal household iron for this, but it is VITAL not to have any water in it at all so it doesn't leak or randomly give you a head of steam which does not work well with inks and paper!  Next step, using a sheet of newspaper with a sheet of greaseproof paper over the top, simply there to make the iron glide easier and to stop newspaper inks marking the iron plate (an important item if you want to use the iron for it's original purpose afterwards), I ironed over the image.  This causes the embossing powders to melt again which then get absorbed in their liquid form by the newspaper.  Clever huh?  What you are then left with is a nicely dyed piece of paper with a bleach effect as the stamped image is now white.

Using the same stamps again, I inked up with black and then, using the central stamp to line up, I turned the block clockwise and stamped, then repeated again.  The idea I was going for was to give the impression of the beginning of the world with explosions and lots of molecules flying about.  I 'think' it worked :-/  I then used some individual letter stamps to create the text 'In The Beginning...' around the forming planet, stamped in black then highlighted with white.

Sunday 6 March 2011

Under the sea...

Blue, green, grey, white, or black; smooth, ruffled, or mountainous; that ocean is not silent.
H. P. Lovecraft


Do you know sometimes you are browsing in an art and craft shop and you spot something which takes your eye, but you can't figure out where or when you will make use of it?  Happens a lot to me!  Happened a couple of months back when I picked up the stamp I have used for this card.  I have no idea who makes it as it was on the sale table and has no branding on it whatsoever, so if you can shed any light, please let me know as I would love to know what make it is!


It is quite an ususual stamp and I have another one like it which is a jungle scene, so I don't think it is a one off. I have coloured it using promarkers in blues and greys.  All the time I was colouring it, it has reminded me of a cartoon which was in Viz called The Pathetic Sharks!  They do look a bit daft and childish with their goofy teeth, don't they?  The stamp, when trimmed, fits perfectly inside the largest of my scalloped nestie circles and I cut out from a piece opaper I had sprayed with some cosmic shimmer mists.  I don't know what is wrong with the spray bottles on these, but the last two I got leak when you shake them so I invariably end up with dyed hands.  My first two bottles were fine and are no trouble at all but these two seem determined to make me look like a Smurf or an extra from Avatar! Ah well, no pain no gain eh?


I wanted to include something to give the impression of waves and hit upon the idea of using my Cuttlebug honeycomb die but just using the offcut it leaves behind.  I used some silver leaf flakes to create the stripe using a strip of DST and a soft brush.  Wasn't sure if that technique would work but was pleased that it did.  I then created another paper using some more cosmic shimmer mists on photo paper and added some embossing powders whilst wet then heated with my heatgun to create more shimmer.  I cut a perfect square out of it and then matted onto a dark blue square which I had stamped with a texture stamp in silver.  I then used some blue and green chalks to soften the edges of the card and then I used an Inkadinkado stamp stamped over the top with more silver to create a few air bubbles and added three pearls for the final touch.


I would like to enter this for the following challenges:


Crafts and Me - Under The Sea
Shannon's Sentiments - Spray Misting
Fairy Tale Challenge Blog - Something for a child
Aifactory Challenges - Water project
Desert Island Crafts - Fits the following: 2. Inspired by Nature, 4. Hand colored image, 6. Pearls, 8. No sentiment on the front