Sunday, 21 August 2016
Friday, 22 July 2016
4 years?
4 whole years... That's how long it is since I have blogged anything at all and that pretty much coincides with the last time I did anything crafty too... Oh my days! Where have I been? What have I been doing? Well, I got married and moved house twice but been all settled for 3 years now and itching to get my craft on again. Just need to complete a room swap round and I'll be back... Watch this space!
Tuesday, 11 September 2012
Oh wow!
Has it really been 9 months since I last posted here????
I've had such a busy year so far I haven't had a chance to craft anything, what with work, work and more work, and oh! Our Wedding!!!! Yes I married my darling husband Steve on 29th August, just 2 weeks ago. Was a lovely day, lousy weather but that doesn't matter one bit when you're marrying your soulmate and best friend... in fact I am sure getting married during a thunder storm makes our day even more special :-)
Well enough wittering, this is just a quick post to say I will be back, just watch this space!
Love and hugs
Mrs Sarah W xxxx
Sunday, 8 January 2012
If you're not quite sure what you are doing... Just Wing it!
Well I am back again. Had a very busy last few months with one thing and another, mainly my baby son having to go into hospital for a minor op. He was in and out same day but we have had this hanging over us for months, and you know how us Mummys worry. The thing that seemed to bother him the most was not the pain or anything like that but the fact that he wasn't allowed anything to eat or drink. He sure made up for it afterwards though and ate a days worth of food within half an hour... I was worried he was going to pop! So as you can imagine I've been a right stresshead!
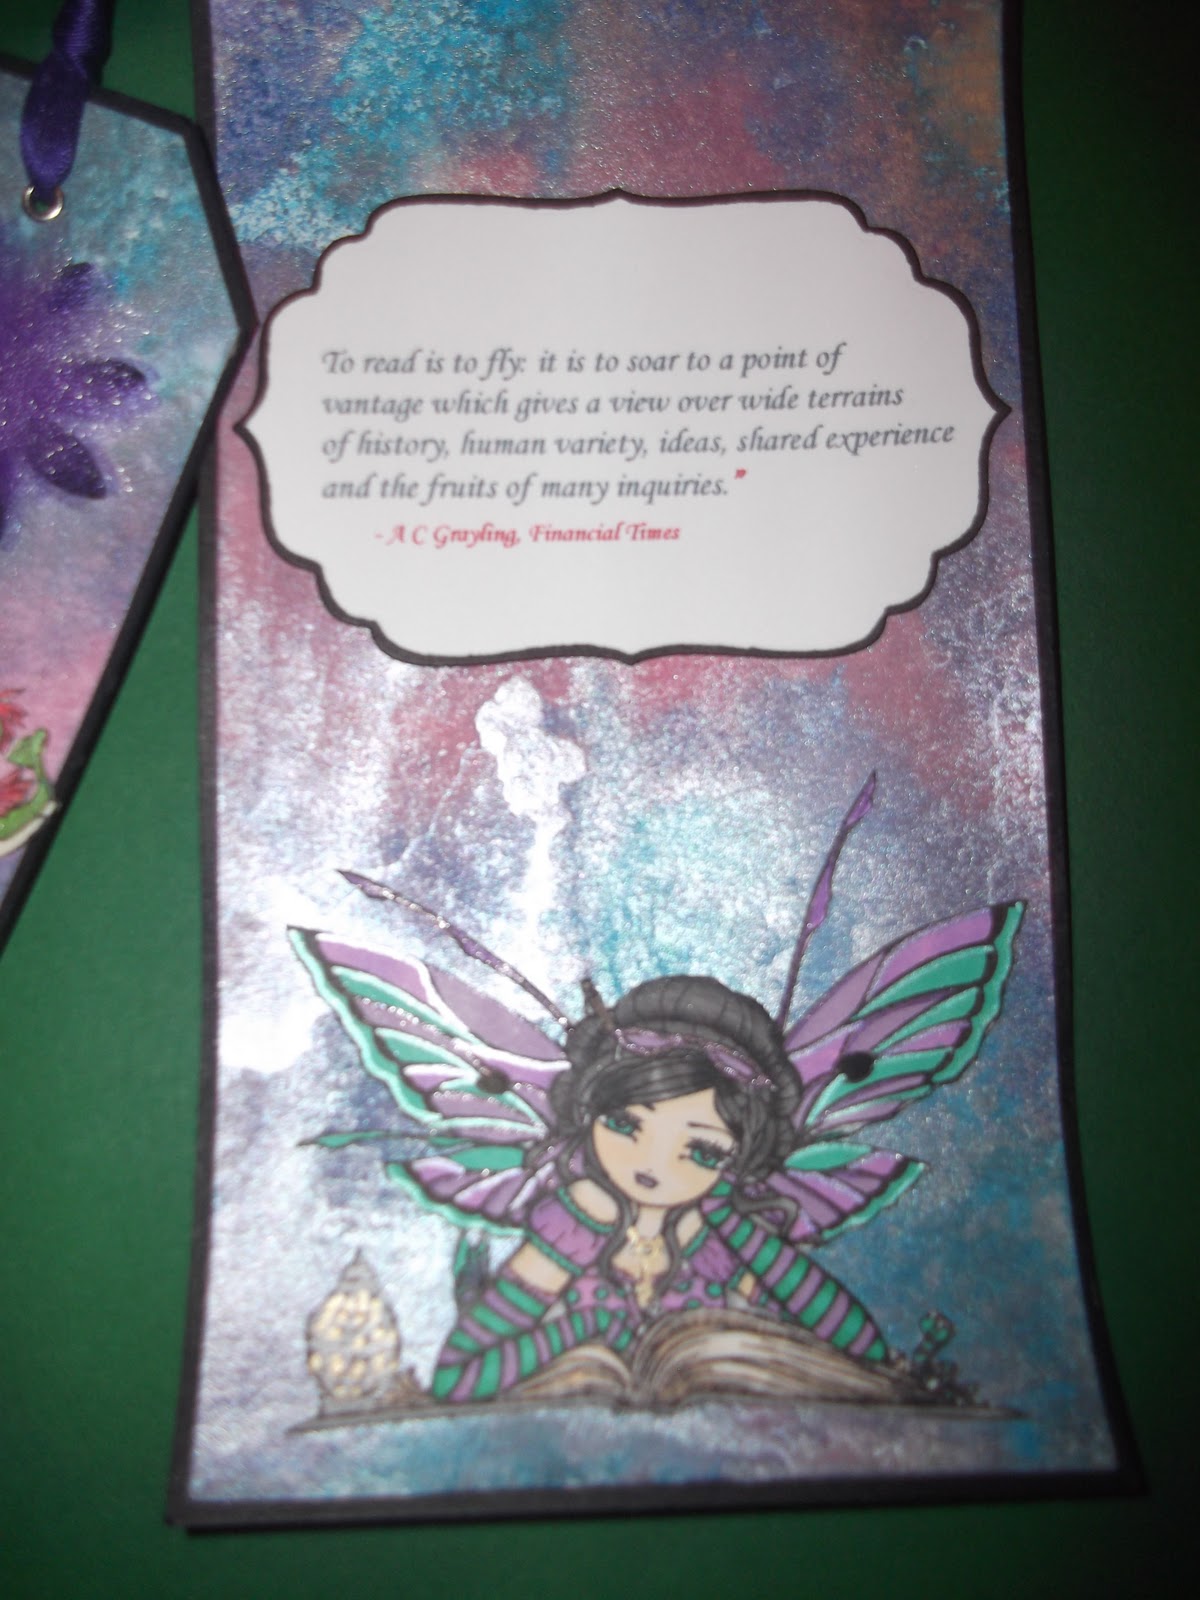
The first Dream Valley Challenge for 2012 is Anything Goes! I love these sort of challenges as I like to try and do something completely different and try out a new idea. I have a habit of starting out on a project then getting distracted by 'real life' and end up with a stack of bits and pieces which I put to one side in the hope that I will one day get to finish it. I wanted to make a bookmark out of some of the bits and pieces, but wasn't entirely sure what I was going to do, so remembered a phrase that someone I used to know used to say a lot and so I decided to 'Just wing it!'.

I have used some beautiful stamps Hannah Lynn's Bookworm Fairy on the main part of the bookmark and Sweet Pea's Lisa Victoria's The Butterfly Dragon on the 'tag'. I used a large tag from a pack which I bought a while ago and never got round to using, spritzed with Glimmermist sprays in pinks and purples and blues to co-ordinate with the colours of the coloured images and swooshed them around a bit with another smaller tag which I had cut using a Sizzix tag die. Not a drop of that beautiful shimmery ink was wasted! Once it had all dried, as is usual with any paper or card which gets wet with inks and stuff, it was all curled up so I used some stiff black card to flatten it out again and trimmed to size.

For the smaller tag image, I stamped the wings onto fantasy film using an iron and trimmed them and layered them so they stand out more. For once, I think the camera has actually caught the effect quite well, but it looks even better in real life. The flower I created myself with some shimmery chiffon type material which I had been given, using a flower diecut to create the petals and held all together with a brad. I realised once it was on the background it was disappearing a little with the colours so I cut another shape out of black card and backed the flower with it for definition. A couple of eyelets and a short length of purple ribbon to link the two parts together and it was complete. :)

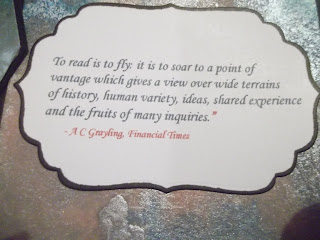
Any regular visitor to my blog will know, I love quotes and often spend many an hour browsing quotes sites online looking for that perfect quote. I found a perfect quote this time and just in case you can't make it out on the photograph it reads “To read is to fly: it is to soar to a point of vantage which gives a view over wide terrains of history, human variety, ideas, shared experience and the fruits of many inquiries.” written by A C Grayling in the Financial Times.
Now, as it is a bookmark I thought I would show it to you in use in the manner to which it is intended, to mark a place in a book. The book I show it with here is the new book in the Wereworld series, written by an old schoolfriend of mine, Curtis Jobling (yes he of Bob The Builder and Raa Raa the Noisy Little Lion and not forgetting Frankenstein's Cat of course). Shadow of The Hawk is the third book in the series and I picked it up when he was doing a book signing session at Waterstones. See, even the book fits in with my wing it theme!

The first Dream Valley Challenge for 2012 is Anything Goes! I love these sort of challenges as I like to try and do something completely different and try out a new idea. I have a habit of starting out on a project then getting distracted by 'real life' and end up with a stack of bits and pieces which I put to one side in the hope that I will one day get to finish it. I wanted to make a bookmark out of some of the bits and pieces, but wasn't entirely sure what I was going to do, so remembered a phrase that someone I used to know used to say a lot and so I decided to 'Just wing it!'.

I have used some beautiful stamps Hannah Lynn's Bookworm Fairy on the main part of the bookmark and Sweet Pea's Lisa Victoria's The Butterfly Dragon on the 'tag'. I used a large tag from a pack which I bought a while ago and never got round to using, spritzed with Glimmermist sprays in pinks and purples and blues to co-ordinate with the colours of the coloured images and swooshed them around a bit with another smaller tag which I had cut using a Sizzix tag die. Not a drop of that beautiful shimmery ink was wasted! Once it had all dried, as is usual with any paper or card which gets wet with inks and stuff, it was all curled up so I used some stiff black card to flatten it out again and trimmed to size.
For the smaller tag image, I stamped the wings onto fantasy film using an iron and trimmed them and layered them so they stand out more. For once, I think the camera has actually caught the effect quite well, but it looks even better in real life. The flower I created myself with some shimmery chiffon type material which I had been given, using a flower diecut to create the petals and held all together with a brad. I realised once it was on the background it was disappearing a little with the colours so I cut another shape out of black card and backed the flower with it for definition. A couple of eyelets and a short length of purple ribbon to link the two parts together and it was complete. :)

Any regular visitor to my blog will know, I love quotes and often spend many an hour browsing quotes sites online looking for that perfect quote. I found a perfect quote this time and just in case you can't make it out on the photograph it reads “To read is to fly: it is to soar to a point of vantage which gives a view over wide terrains of history, human variety, ideas, shared experience and the fruits of many inquiries.” written by A C Grayling in the Financial Times.

Now, as it is a bookmark I thought I would show it to you in use in the manner to which it is intended, to mark a place in a book. The book I show it with here is the new book in the Wereworld series, written by an old schoolfriend of mine, Curtis Jobling (yes he of Bob The Builder and Raa Raa the Noisy Little Lion and not forgetting Frankenstein's Cat of course). Shadow of The Hawk is the third book in the series and I picked it up when he was doing a book signing session at Waterstones. See, even the book fits in with my wing it theme!

I would like to enter this for the following challenges
Challenge up your life - Bingo - Diecut, purple, sparkle
Our Creative Corner - Show us your shapes
Crafts and Me - Anything Goes
Flutterby Wednesdays - Open (but must have wings and this has plenty!)
Really Reasonable Ribbon's Ramblings - Sparkle and Ribbon
Magical Monday Challenge - Anything Goes
Monday, 17 October 2011
Tilda-th do us parts...
It was my turn over at Crafty Cardmakers to set the challenge and I didn't have to think about it for very long. I knew what I was going to set straightaway and I hope you will enjoy it too, it's Cute with a dark twist, just perfect for Halloween! Much as I like some of the cute stamps you see out there in cardmaking land, I do tend to lean towards the darker side. So what better stamp to use for my very own challenge than the Magnolia stamp, Tilda with Cherries? "But that's too cute!" I hear you cry. "You can't do something dark to a Tilda!" WATCH ME Bwahahahahaha! It made quite a refreshing change to abandon my usual skin tone promarkers and reach for the cool grey and light greens, it just felt so wrong! But it also felt so right for this card. I think she looks positively zombified with her deathly green pallor don't you? Yet even in her newly putrified state, she still looked too darn cute... even with her featureless face with the eyes which bore into the depth of your soul...
So I gave her what she has need all along. Fangs! They just suit her so much hehe!

I have used some papers from Craft Chaos Design's Creature Feature set. I have been hoarding these papers for months and been itching to use some of them, but the usual cute and cheerful happy smiley stampy style didn't really fit with them very well, but here, they really come into their own. I folded the card into a step card as I wanted the zombie girl to have somewhere to sit besides her pumpkin (which was plain until I drew the face on it) and hoped to create a bit of shadow to add to the spooky feel. The shadow shows great under the room light, right up until I try and take a photograph and then it vanishes. You can see a bit of it behind her hair - see! Even now the evil one is taunting me!

So I gave her what she has need all along. Fangs! They just suit her so much hehe!


The sentiment - and boy is this a sentiment and a half - came from Tiddly Inks. I have been storing this one up for months too. I printed it, tore it and inked it up with pepper red adirondack ink and added the finishing touch of some inky/bloody fingerprints - MINE! So how is that for a unique stamp eh? Just finishes it off I thought.
Happy Halloween! xx
I would like to enter this for the following challenges:
Addicted to stamps - Halloween
Magnolia Stamp Lovers - Halloween
Totally Tilda Challenge - Halloween Tilda
Monday, 3 October 2011
Tilda, roses and things
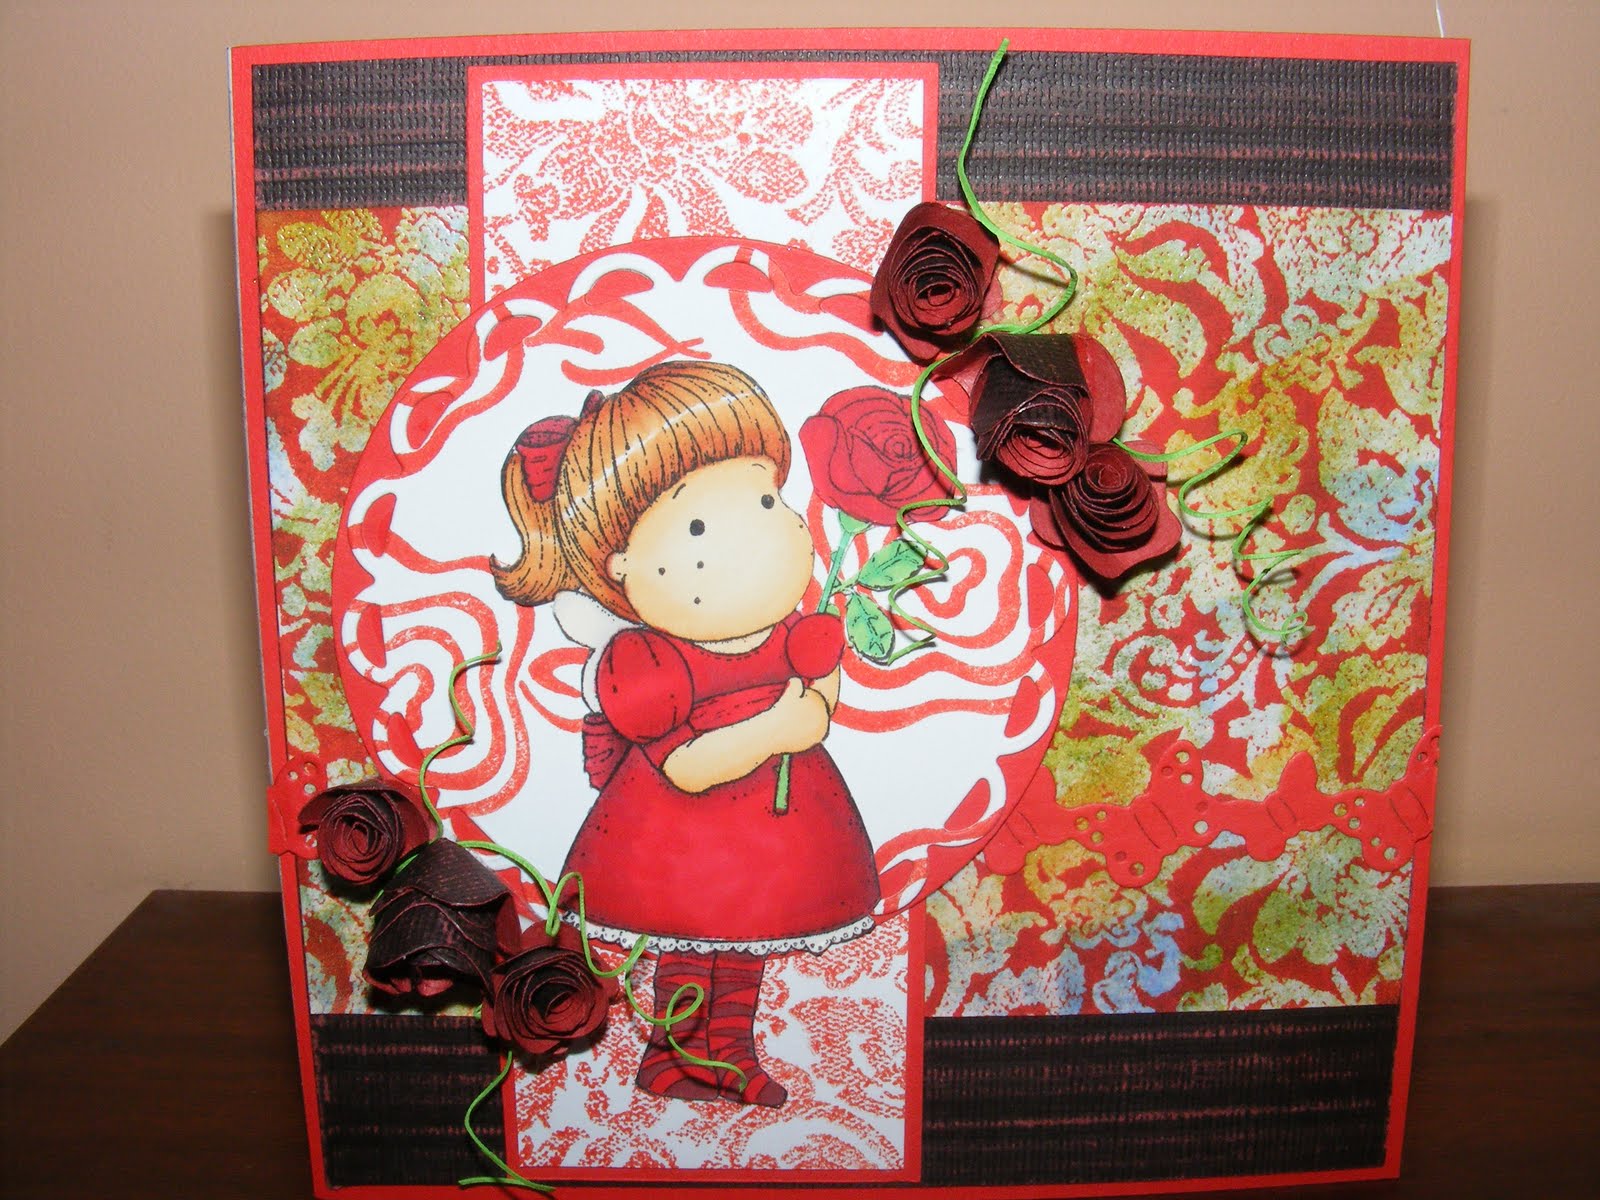
Sometimes you just have to face a fear head-on. Regular viewers of my blog may have picked up on the fact that I have a little fear of Tilda, and it's not completely irrational. The featureless children make me a little uneasy if I am honest as the human face as a mouth and a nose as well as eyes... I know I am not alone in this fear too as I saw somewhere on my travels round t'interweb a tutorial for adding features to the faces! A while ago I picked up a couple of Tilda stamps on a sale table and I decided that I was going to be brave and have a go. This is the second one I have done now and they still freak me out a little!

Over at Crafty Cardmakers this week we have a challenge running for Anything Goes! We've all had a bit of a break over the summer months with one thing and another and this is our first challenge with the newly formed team so it would be lovely if you could pop over and have a look what we have all been doing :)
I have coloured her in red promarkers for the dress etc and used shades of ginger for the hair. I have made all the background papers myself with a combination of repeated stamps and a background stamp I have. The multi-coloured background is made with adirondack inks, dabbed around to make a blended background, then stamped over with clear inks and embossed with clear powder so the colours would show through, then brayered over with red. I really liked this technique and have plans to use it again with snowflakes and the like on xmas cards. At the very back is a piece of Core'dinations black magic paper, embossed with a stripy sizzix plate and then sanded to oblivion to bring out the stripes. The circles are cut with both plain and scalloped edge nesties. I have layered the card up with red paper to trim and used a scrap to cut a strip of butterflies as a ribbon across the card. The roses are also made using Core'dinations paper roughed up with sandpaper (to match the background) then die-cut using a rose making die. I love the way these form as it just doesn't look like it will work when you are looking at a wiggly spiral of paper but a bit of careful rolling, a good splodge of tacky glue and a hold for a few seconds and hey presto, pretty flowers! The spirally bits form magically when you cut a very thin strip of paper using a blade and a metal ruler. I discovered this by accident and think they look really pretty and give a bit more dimension to the flowers.
So there it is, a Tilda card, and my second one at that! As I have been so brave, I am would like to enter this one at Just Magnolia as I have used their sketch for this card's layout. Papercrafting Journey want to see die-cuts or punches. Creatalicious Challenges are running one for Anything Goes too :)
Sunday, 25 September 2011
The creation of a thousand forests is in one acorn...
It's autumn again. Not that I think summer ever really happened for us here in the UK, it's been a bit of a miserable one. OK, we have had a few nice days and it hasn't rained all the time so have to think positively really, and it has made all the garden grow, especially the weeds which have been steadily taking over my garden. Seems as soon as I have got to one end of the garden and cleared them all, some more have poked their ugly little faces through the ground and sit there taunting me. A friend of mine bought his wife some sort of flame-throwing weed killing device which greatly appeals to me and the mere thought of this caused me (and his wife apparently) to laugh maniacally. Bwahahahaha! Die weeds! Die! And the flipping oak tree which has been taking a battering in the wind and bombarding my car with acorns... Oops I am being negative again. Hehe
I've rambled previously about how autumn is my favourite season and I have to say I am not enjoying this one so far. My little boy started school at the beginning of September and the weather has pretty much been lousy every since. First day the rain was blowing sideways on our journey home, and wasn't that the day we decided to go the longer route so he could let off a bit of steam on the way back? Then a few days later the heavens opened exactly to coincide with the time my daughter came out of school. I think it was the tail end of Hurricane Katya as we had mega gusts of wind, rain and hail blown horizontally into the poor children's faces as they were walking home. First I knew of anything was hearing the screaming from outside of children who were getting shotblasted with little balls of ice. It had been so nice earlier in the day too! Then the sun came out and we had blue skies. Confused.com lol

Anywayyyy, onto my card. I'm sure you don't need to hear quite so much about the weather eh? I have used the beautiful Sweet Pea Stamps ching-chou kuiks Come Softly, coloured with Promarkers. Yes, I still love colouring in ;-) I've been practicising hair and trying to get shine into it rather than it just appearing flat. I think I am getting there slowly, but still have some way to go. I have used just pink, brown and cream colours to colour the main image and then created the background directly behind her with Adirondack ink dye pads blended in with my blender. I was very pleased with how it turned out and even more pleased when I realised it was a perfect match for some Basic Grey 'chantilly' paper I had. I have used that at the back of the card and used some other Basic Grey papers 'two scoops' and 'blush' to build the card up. I have followed the sketch at CASE study for the layout, with the stitching and the panels.
Now, back to autumn, and that darned oak tree. Last week it dumped a great big branch, laden with little acorn cups, onto my driveway and as it wasn't raining (for once) I picked it up and took it into the house and let it dry out a little more as it look perfect for autumn projects. I cut a small piece off and sprayed it with gold shimmer mist and I love the effect. I finished off with 3 ribbons tied together into a bow.
I think the oak tree is having it's revenge as I type as I have just heard another load of acorns hit my car *sighs*
Friday, 19 August 2011
Vintage - It's the old brand new!
It is easily overlooked that what is now called vintage was once brand new. - Tony Visconti
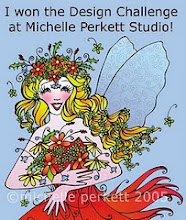
I love vintage clothing! I am particularly fond of fifties style dresses and as soon as I find an occasion to wear one I will sooooo be in one! I love the sticky out skirts and the starched stiffness and the net skirts which go underneath. I also like the necklines, halter necks and wraps, enhancing the décolletage which give a really sexy look but without revealing too much and retaining that important air of demure. I was thrilled to find that Michelle Perkett Studios are running a 'Vintage' theme to their challenge this time round and was even more pleased with the stamp they had on offer as a freebie. This dress just rocks! I seriously want to wear it!

I have coloured the main image with promarkers in vanilla, rose and baby pink to match a piece of backing paper I had in mind for the card. I cut it to an oval shape then cut a slightly bigger oval from some Coredination paper which I ran thru my Sizzix with a polka dot embossing plate and then attacked with some sandpaper to bring out the dots. The rest of the backgrounds I have made myself using a combination of a background stamp and a brayer to apply adirondack caramel ink. The very back of the card is made using just the run-off ink left over from inking the stamp. Brayers are fab for applying ink to that sort of stamp and always have plenty of ink left to make some paper. Nothing is wasted! Regular visits to my blog will know I love making my own backgrounds. I have lots of designer papers but nothing is quite as much fun as making your own. I am forever on the lookout for new ideas of things to do like that. The DP I have used on this one is designer unknown... I have a habit of picking up papers just because I like them and think I could use them and sometimes pick up odd sheets here and there so I end up with loads that I haven't got a clue what they are or where they came from...
The paper ribbon behind the main image is a strip I had left over from another project, it's made using adirondack inks sploshed around and then stamped over with my favourite olde worlde wordy stamp. I keyed the colours in a little by rubbing over with the caramel ink pad I used for the background. I used some lace ribbon at the bottom to further add to the vintage theme (it's pretty old!) and added 3 amber coloured gemstone brads for that all important bit of bling! The sentiment comes from an Anna Griffin set of stamps - stamped then embossed with gold.
I have used the sketch supplied by PaperWorks Co. Creative Stamp Friends challenged us to make our own background so that's what I did! Digi Design House wanted to see 2 patterned papers, a ribbon and 3 brads.
Monday, 15 August 2011
A Summer Daydream
It's summertime, apparently. The weather most of the time would suggest otherwise! Apart from the odd couple of days of sun here and there, we seem to have been cursed with grey skies and miserable weather on the whole. 6 weeks of 4 bored kids who I can't even take to the park to run off some energy because you can never be quite sure what the weather is going to do next... My elder son has ADHD and to coin a term of his Grandma 'is like Tigger on speed!' and I think if I haven't gone completely grey by the end of the year it will be a wonder. He's off to big school in September and it will be a break for us all, especially my youngest who is 2seriously attention starved as his big brother hogs it all. The poor baby is a boy of very few words, mainly because big bro says it all for him - he never gets a chance to get a word in edgeways! Still, he has words for his favourite things, like juice, banana, kitchen (where the food comes from!) and perfect. He learnt 'perfect' a couple of nights ago as he was looking at the word on his vest and I said what it was and he started repeating it. I was thrilled! So now, when I get him ready for bed he waits for me to give him a new word. Tonight's was 'maiden', which has pleased his Daddy no end as he is a big Iron Maiden fan!
Summertime when I was child was my favourite time of year as it meant a long time off school, always off out with my friends playing out somewhere and getting into scrapes. I will have to put on my rose-tinted glasses for while and remember the sights and smells of summer - I just remember that there was always lots of flowers around. I don't think a lot of people seem to have time for their gardens anymore - I know I don't get much chance with looking after the children but there is nothing nicer than a garden in bloom. My daughter seems to be quite happy to stay indoors drawing or on her laptop which just seems really alien to me as when I was her age, I was never in the house. She's probably saving up all her energy for going on holiday next year with my sister. They are going on a cruise now she is finally in possession of a passport :-)

Flowers are very popular in the world of craft too. The digital stamp I have used for this project is one by Michelle Perkett and is called Daydream Fantasy. I have had it in my collection for a while and to be honest, I have never used it as I thought it looked too complicated, but today I decided to be brave and give it a go. I don't have the fancy new fine-tips for my promarkers yet so I just had to be very light and gentle adding the finer detail of the flowers. I've used carmine and magenta for the pinks and olive and pear green, plus a little saffron and yellow for the hair. I've used stickles and cosmic sparkles to add a bit of shimmer to the wings and the leaves, in fact I added shimmer to it all! What you are looking at is actually the front cover of a notebook. I will be demonstrating how these are done in my next blog post as this is actually the fifth one I have done. I added a few more flowers to give more of a summery feel in pink and purple.

Just added this extra shot to show the sparkle a bit more :)

And also added this to show that it is a notebook :)
I'd like to enter this for the Craft Your Passion Challenge for Anything but a card. Make My Monday want to see a Fairies or Angels.
Summertime when I was child was my favourite time of year as it meant a long time off school, always off out with my friends playing out somewhere and getting into scrapes. I will have to put on my rose-tinted glasses for while and remember the sights and smells of summer - I just remember that there was always lots of flowers around. I don't think a lot of people seem to have time for their gardens anymore - I know I don't get much chance with looking after the children but there is nothing nicer than a garden in bloom. My daughter seems to be quite happy to stay indoors drawing or on her laptop which just seems really alien to me as when I was her age, I was never in the house. She's probably saving up all her energy for going on holiday next year with my sister. They are going on a cruise now she is finally in possession of a passport :-)

Flowers are very popular in the world of craft too. The digital stamp I have used for this project is one by Michelle Perkett and is called Daydream Fantasy. I have had it in my collection for a while and to be honest, I have never used it as I thought it looked too complicated, but today I decided to be brave and give it a go. I don't have the fancy new fine-tips for my promarkers yet so I just had to be very light and gentle adding the finer detail of the flowers. I've used carmine and magenta for the pinks and olive and pear green, plus a little saffron and yellow for the hair. I've used stickles and cosmic sparkles to add a bit of shimmer to the wings and the leaves, in fact I added shimmer to it all! What you are looking at is actually the front cover of a notebook. I will be demonstrating how these are done in my next blog post as this is actually the fifth one I have done. I added a few more flowers to give more of a summery feel in pink and purple.


And also added this to show that it is a notebook :)
I'd like to enter this for the Craft Your Passion Challenge for Anything but a card. Make My Monday want to see a Fairies or Angels.
Tuesday, 2 August 2011
Sparkle and snowflakes and just a touch of red
Just been having a root through my blog and found this which I hadn't posted!
This time of year always amuses me. How do you do Christmas when you're not religious? You may notice from my recent bloggings, I just don't do Christmas at all! I think I have done fairly well so far to produce a few Christmas card which are neither religious or traditional and don't actually mentions the C word at all. I'm not a descendant of Scrooge, honest, I just loathe all the commercialism that surrounds it all. So, given the choice, I will choose wintery themes, snowflakes and sparkle, only this time I decided to go for something a bit different.

I am obsessed with red. Well actually I'm not as obsessed as I used to be, but that is probably because now I have a full house and lots of kids running about, there isn't as much opportunity for all the little knick-knacks I used to favour. You should see the state of my lovely red candle set after they got toddlerified lol So every so often I decide to indulge myself and do some crafting in red, and this time of year gives the perfect excuse. I can do festive if not Festive right?
The image I have chosen for my card is Sweet Pea ching-chou kuik's Fluttering-butterflies. It's a really pretty stamp and I have had some stamped images on paper sitting around for a while, just waiting for me to decide what to do with them and I was flicking thru the stack and spotted this and just knew she would look stunning in red and green. I coloured the dress and wings in a combination of poppy and forest green promarkers and the moon and lantern with buttercup and vanilla and touches of gold. The background is coloured with indigo blue, and the skin with almond and dusky pink. Hair I coloured with cinamon and gold and I think it looks like her hair has captured the moonlight. For a bit of added sparkle I have used my trusty gelly roll pens - always good for a bit of bling.
I am rather fond of my nesties, would love to be able to buy more but they are soooo expensive, definitely worth it but still! I trimmed the main image using the biggest in the deckled rectangle set and had a bit of an accident where it wasn't lined up properly so I shifted the image up a bit and cut it again and hoped for the best and luckily it cut straight so I got away with it, phew! I love my starburst stains and had made a sheet of red card which I used as the background then I used some red glitter paper from my stash to trim the edge and cut again using the largest die out of an offcut of the starburst background, but I didn't think it stood out well enough, so I dipped the edges in glue and then in ultrafine red glitter to make it really sparkle. Coloured a few flowers with poppy and dipped their edges in glitter too, and the coloured a peace of lace ribbon using poppy again. This I placed along the side of the glitter paper and offset the red card and the image and put that on and added the glittered flowers. I used a few red gems to add an extra bit of sparkle. I knew the card needed a bit more, but I couldn't think what.
When I visited The Stampman a few weeks ago, Vix was demoing triple embossing and although I tried it as soon as I got home, I couldn't quite get the hang of it, but I had to have a go again for this card. I was lucky enough to get some Christmas shape chipboard a while ago and in there I had some stars in different sizes. I used moonglow angel wings ruby and layered it up using my heatgun and then stamped into it with a snowflake stamp... and it worked this time! I attached the stars to a a thin piece of ribbon and punched a hole in the card, added a yellow star (which I coloured up a little with pink promarker so it wasn't so yellow and attached the stars so they hang freely like a tree decoration.
Subscribe to:
Comments (Atom)